How to Organize Your Garage in 5 Simple Steps
Learn how to organize your garage and keep it that way with these 5 simple steps.

This is a sponsored conversation written by me on behalf of Newell Rubbermaid. The opinions and text are all mine.
Did you recently see fireworks and hear choirs singing? No? Well we did. And we had a little party too because OUR GARAGE IS ORGANIZED!! Yes, after lots of purging and planning and even a little painting, we now have a garage that we’re not embarrassed for the neighbors to see. Hallelujah! The back wall of the garage just makes me smile.
This post contains affiliate links for your convenience. I may make a small commission on products purchased with my link, but your price does not change. For full disclosure go here: Disclosure and Policies. Thank you for supporting my site.
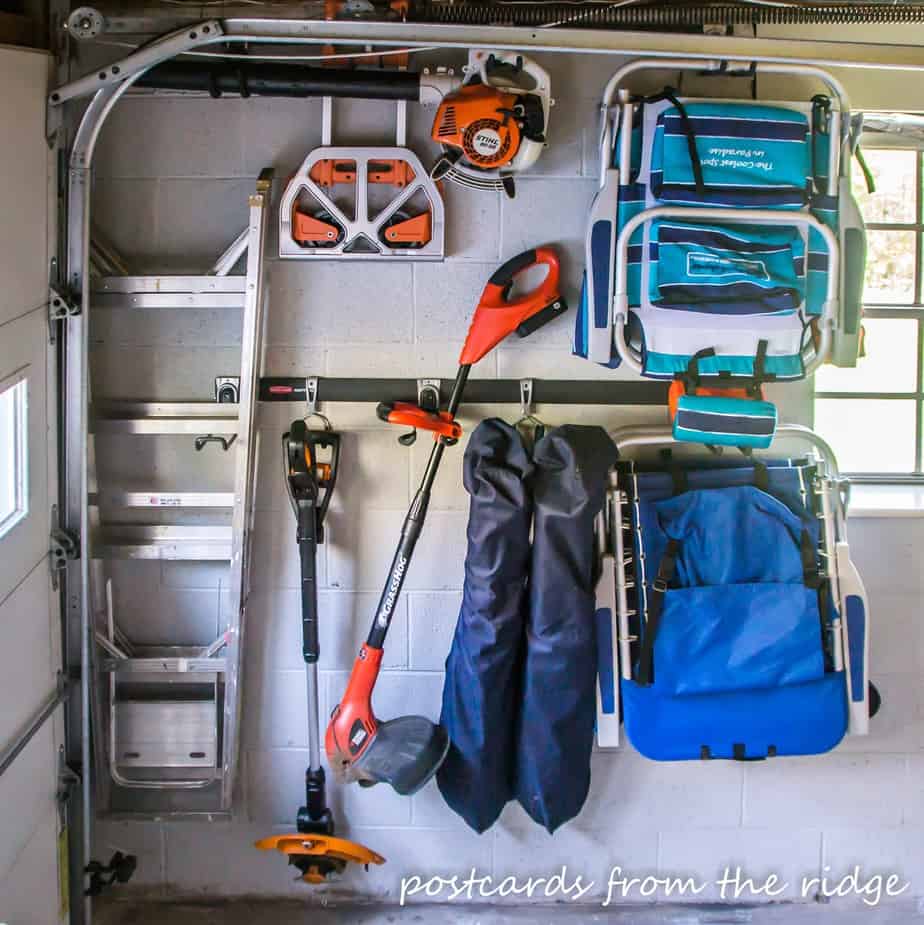
The side wall. Smiling at this one too.
How did we do it? That’s the question everyone is asking. To put it in 5 simple steps, here’s what we did.
- Plan
- Purge
- Prepare/purchase
- Put together – install
- Put up – hang things on the wall
It really wasn’t too bad once we got started on it. And if we hadn’t decided to paint the walls it would have taken even less time and effort. You could realistically do this project in a day or a weekend, depending on the amount of purging that needs to be done.
In my previous post I shared how we first came up with a plan, then purged (and purged some more), then headed over to Home Depot to get the garage organization gear (prepare and purchase) from FastTrack. This stuff is a godsend for us. It might have saved our sanity, for real.


It may sound silly, but I’m actually finding excuses to go in here now instead of avoiding it like the plague. And now that we’ve got the biggest part of the garage organized and looking nice we’ll be moving on to the other side and the workshop so stay tuned for those areas.
We’re on a roll and don’t plan on stopping until the whole garage is in ship shape. I’ve said it publicly now so hold me to it if I start to wimp out.
If you didn’t catch the before pictures and our plan for the space here, I’ll give you a reminder of how this space used to look. Be warned, it’s not a pretty sight. Here’s the back wall.

Before we started the purge. Keeping it real, folks.
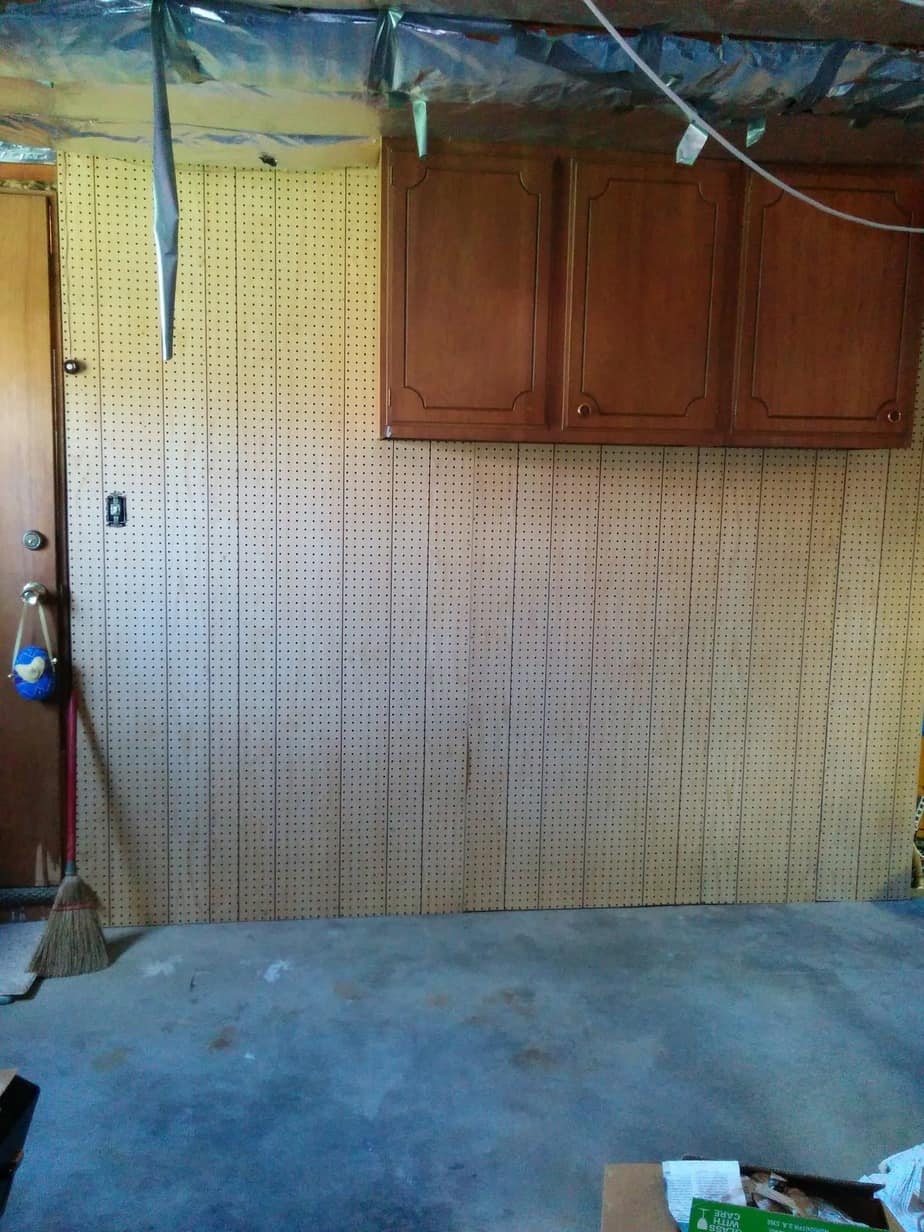
After the purge. Even with all the stuff gone, it’s ugly. Who knew they made pegboard that looks like paneling? Fancy, schmancy. At least it WAS in the 1960’s.
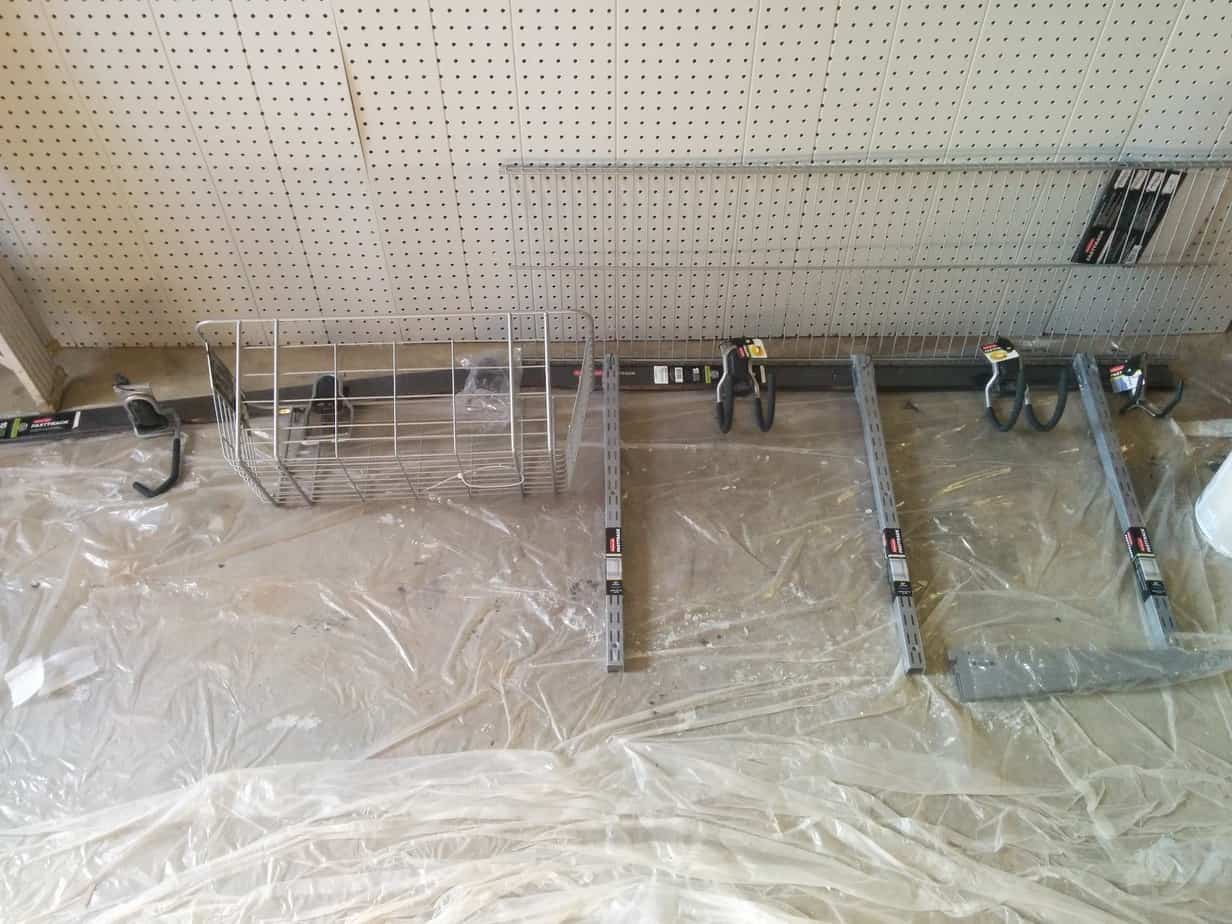
I painted the pegboard to give it a fresh look and bring it into the 21st century. Much better already. FYI – if you have paneling that you want to paint, find out how it’s done here.
Next, I laid out the pieces and planned the placement of the FastTrack System before installing it. Then I installed the system myself. There are pictures to prove it below, haha. It was actually quite simple. My husband helped with the purge and painted the block wall (thanks, honey!), but the installation was all done by me.
Here the FastTrack is installed on the pegboard wall and waiting for our things to be hung on it.
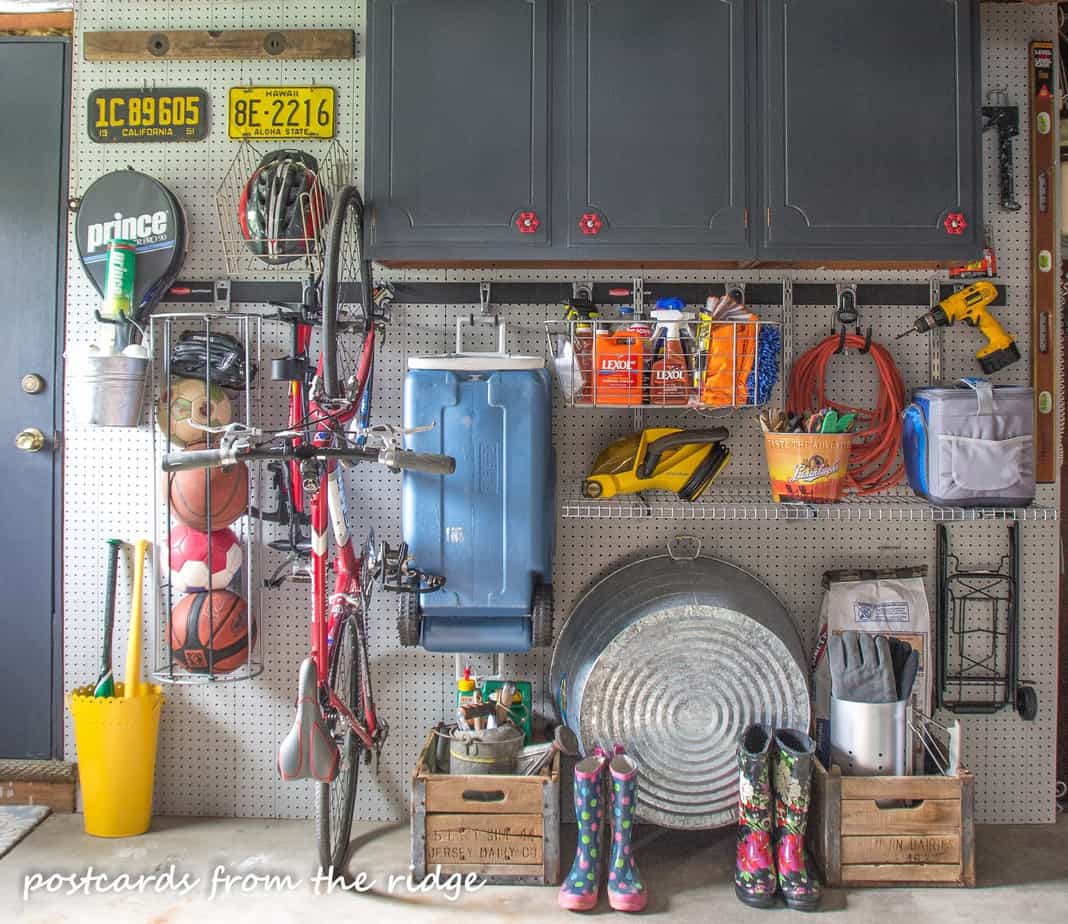
Voila! An organized garage wall! Here’s what we have on this wall, which is about 8’6″ wide x 8′ tall.
- Sports equipment including a bike, helmets, tennis racquets and balls, and bats
- Gardening supplies
- Grilling supplies
- 2 coolers
- A drill
- An extension cord
- A wire basket full of car cleaning supplies
- A small vacuum cleaner
- Our giant galvanized bucket that we use as a drink cooler for large outdoor gatherings
- Plus smaller items stored inside the cabinets, and a small luggage cart, caulk gun, and newer level on the pegboard.
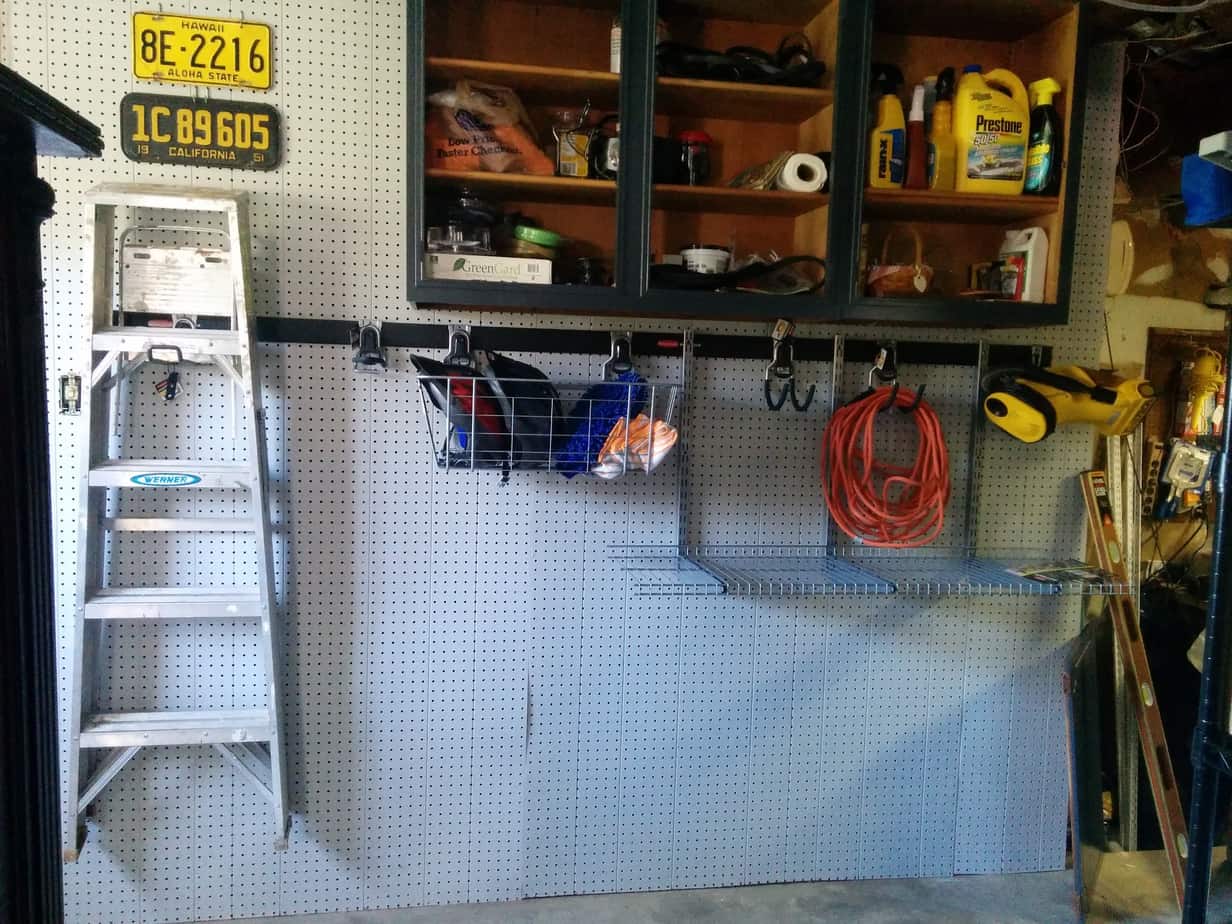
I painted the cabinets too, and changed out the knobs to make them more fun. They’re actually water spigot handles! And I added some vintage character to the area with the old wooden milk crates, vintage license plates, and the very old wooden level. It looked too industrial for me before I added those things.
But wait, there’s more!! We also utilized the side wall of the garage for organizing our things.

This area of the the garage had piles of chairs and many other things that needed to be purged and moved up off the ground. We purged and sorted and then painted this wall as well.

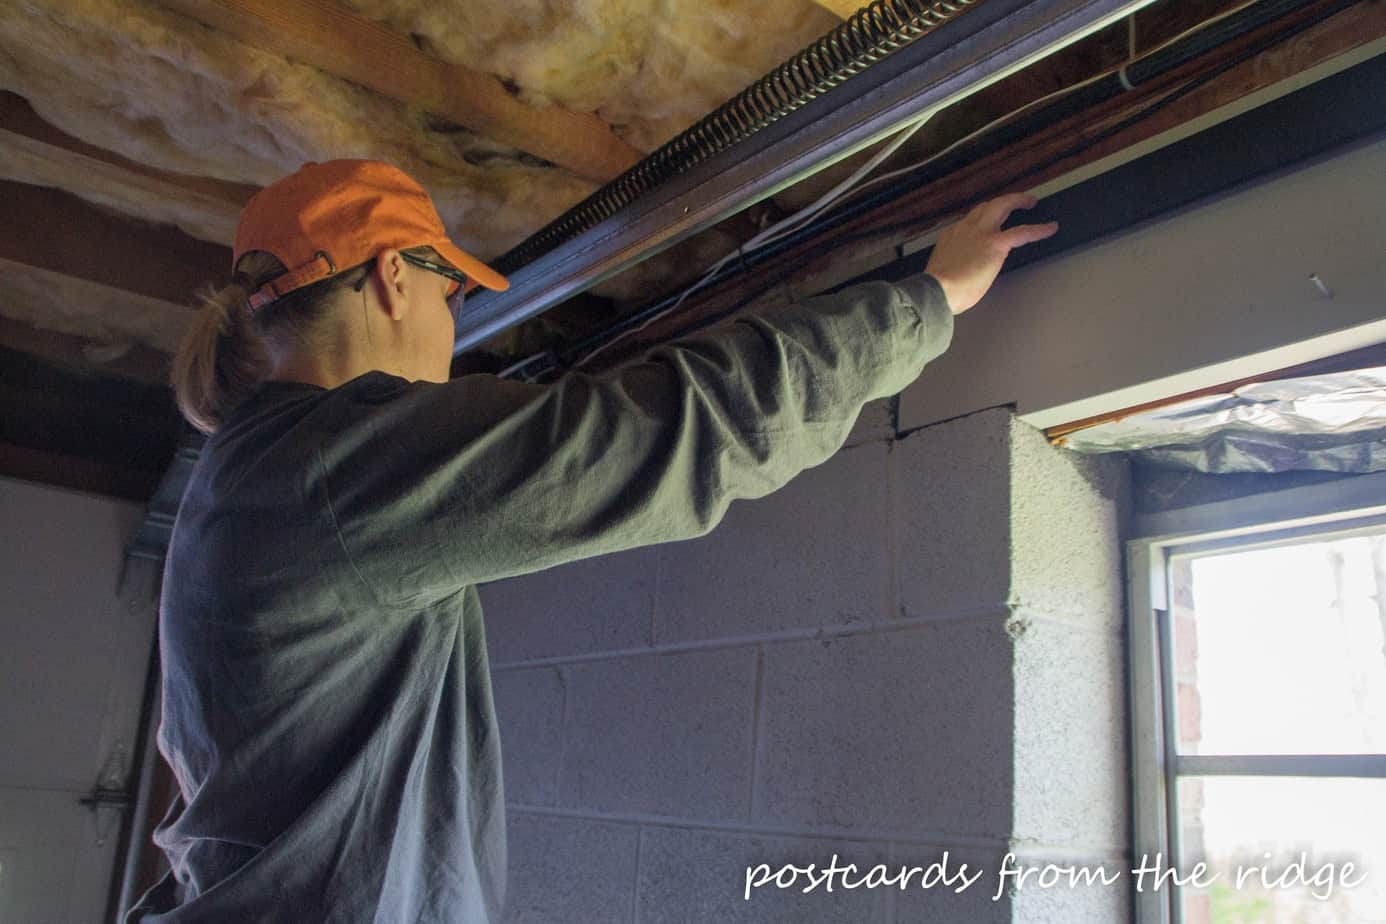
Who’s that handy chic up on the ladder drilling into block walls? That would be me, installing the hanging rails. These rails can be installed on virtually any type of wall. For the block walls, I used a special drill bit for concrete/masonry/block and drilled pilot holes first, then used heavy duty Wall Dogs to hold the rail in place.
After the rail was installed on the wall, I slid the cover over it and then snapped on the hooks. All that was left to do was hang up our stuff! And since the hooks snap off as easily as they snap on, rearranging them seasonally will be simple.
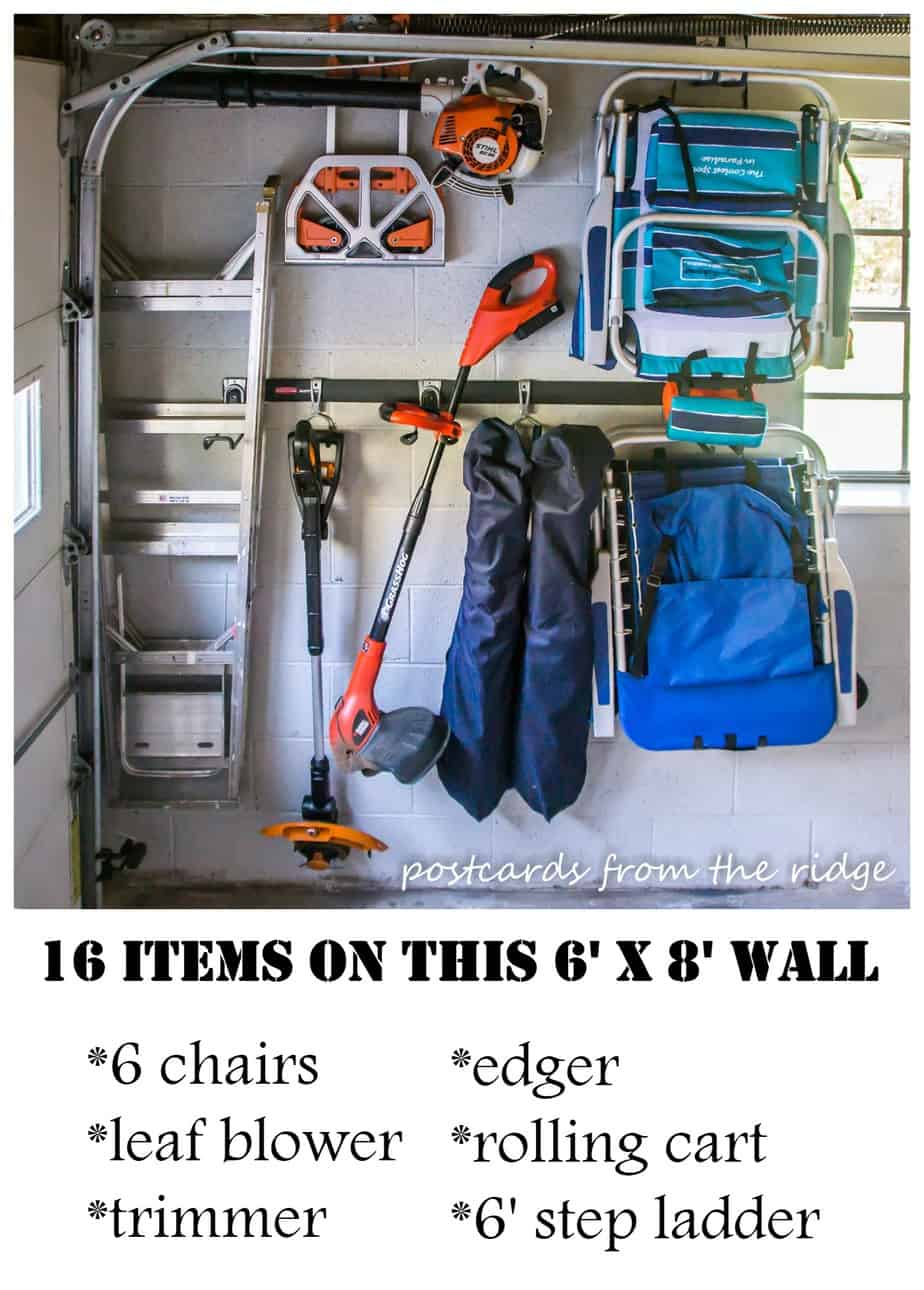
Here’s how the wall looks now. My husband couldn’t believe all of the things I was able to get onto this wall with the FastTrack system. I was a little surprised too! I put things here that we need outside on a regular basis, hoping that they will be put back into place since it’s so convenient to the door.
Here’ a breakdown of the FastTrack items we used for this project, all available at Home Depot or online here:
- (4) 48″ Hanging rails
- (1) 24″ Mesh Basket*
- (1) 48″ Wire Shelf*
- (3) 24″ Uprights for the shelf*
- (3) Brackets for the shelf*
- (1) Vertical Ball Rack*
- (1) Vertical Bicycle Hook
- (4) Cooler Hooks
- (1) Ladder Hook
- (2) Utility Hooks
- (1) Power Tool Hook
- (5) Multi Purpose Hooks
- (1) Compact Hook
Tools and supplies needed:
- Drill
- Level
- Hardware (we used these for our block walls)
- Ladder – if you’re installing the rails high on the wall
- Safety glasses
That’s a lot of items and a ton of organization. Your project may not require this many items, but I wanted to give you an idea of what we used for two 8′ walls. Most items can be picked up in the store, but some (the ones with the *) will probably need to be ordered here. FYI, to make it super easy, you can order everything you want online and simply pick it up when your order is ready. They will even ship it to the store for free if it’s not in stock!!

There you have it. A garage that went from a disaster zone to a very organized space in 5 simple steps. Hopefully you can see that any space, regardless of how messy it is, can be transformed into a usable, tidy space with a little work and the right supplies.