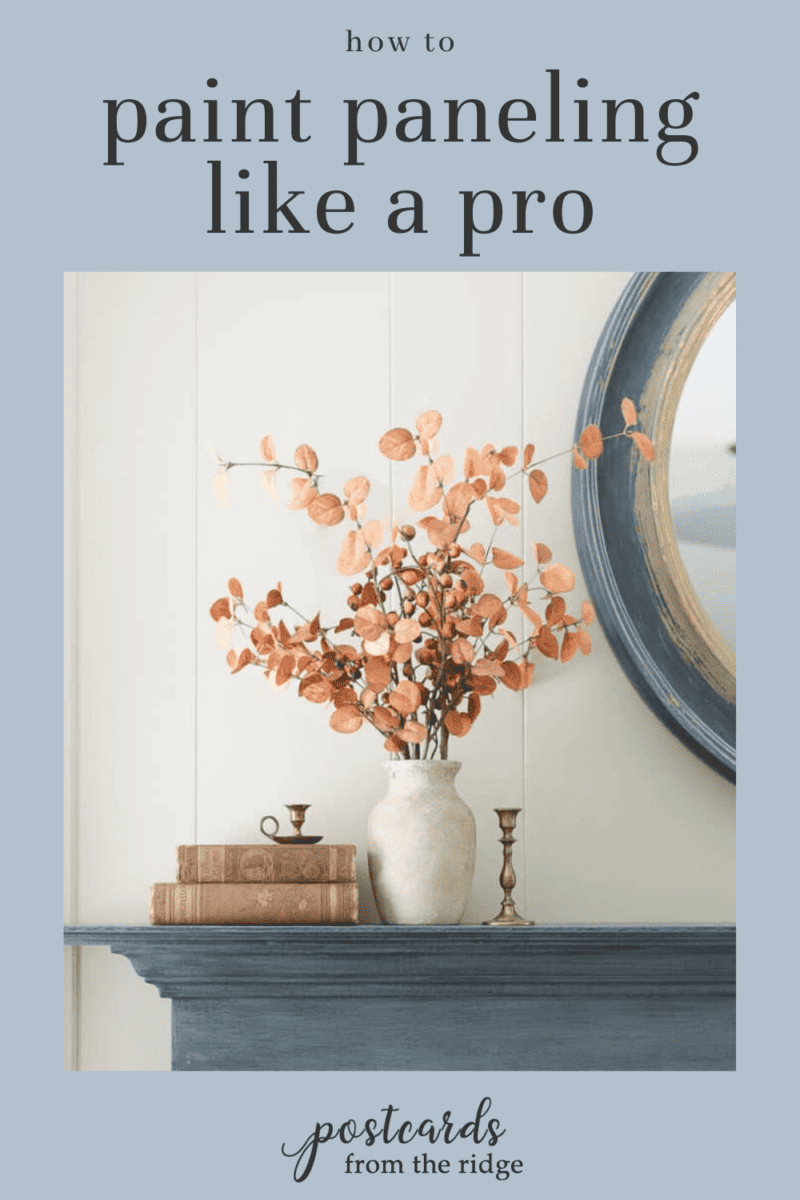
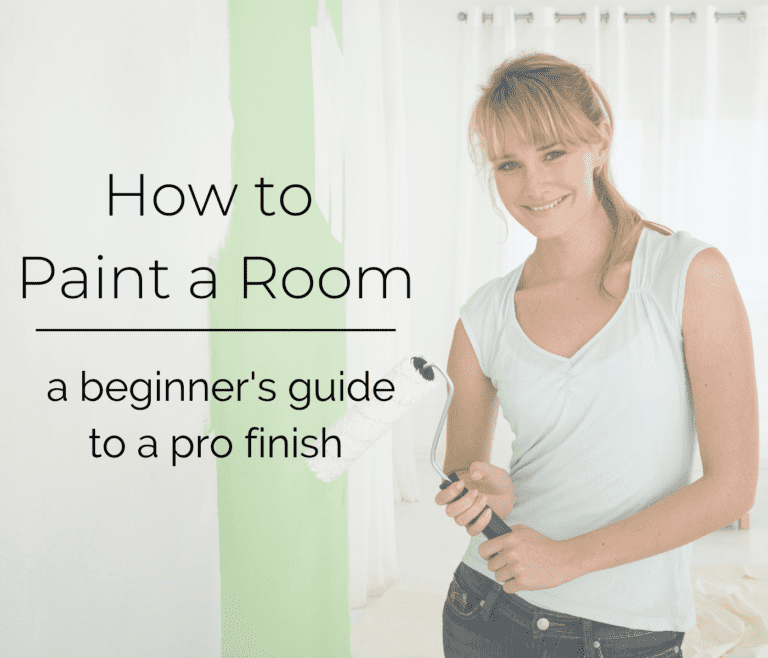
How to Paint Paneling Like a Pro
Learn how to paint paneling like a pro and instantly update your older home. This in-depth tutorial will show you what to use and how to make it look beautiful. So if you live in a house from the 60’s, 70’s or earlier, there’s hope for updating your paneling without the expense and mess of replacing it all with drywall.
How to Paint Paneling
Our house is blessed with 3 different types of paneling. We feel so fortunate (sarcasm). Most of it has been painted over and looks 100% better, but there are still a couple of areas that I haven’t gotten to with my roller and brushes yet.
I’ve painted paneling several times in our current house and also in our last house, and it’s really not that complicated. Other than using the right primer and roller cover, it’s no different than regular painting.
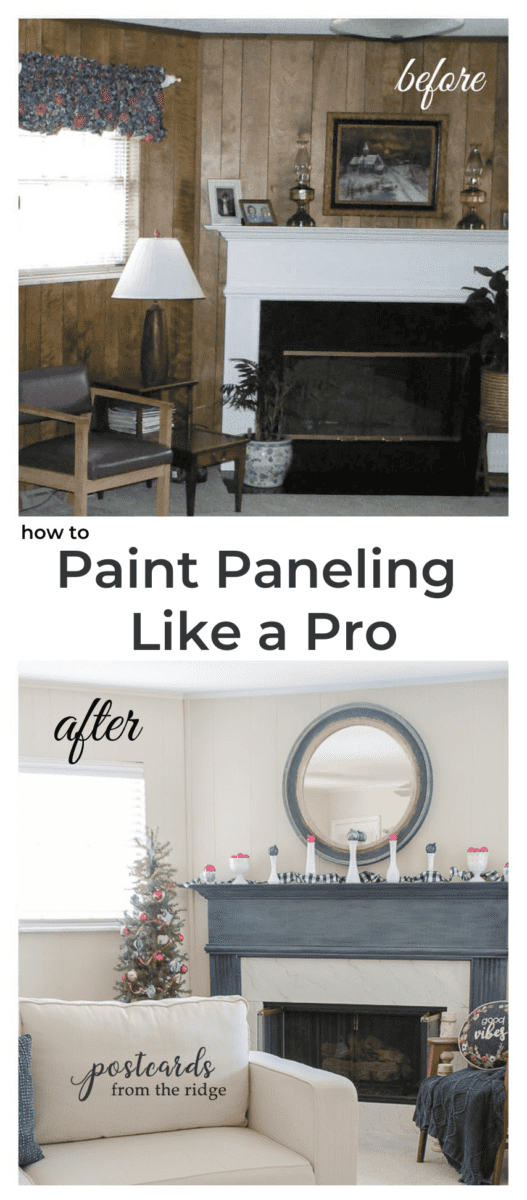
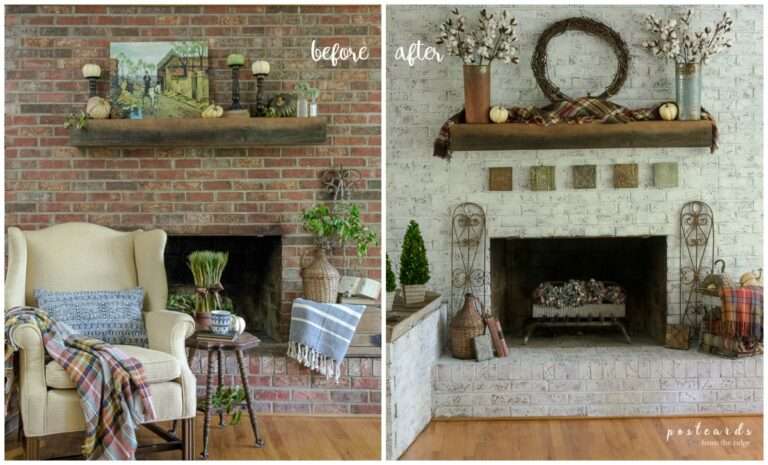
I’m sharing a few before-and-after pictures of our family room to give an idea of how big the impact of painting paneling can be. The before pics were taken when the previous owners lived here and show their furnishings and decor.
The after pics were taken after I painted the paneling and added our decor and furniture to the room. Priming, caulking, painting the paneling and the trim made a huge difference in this room.
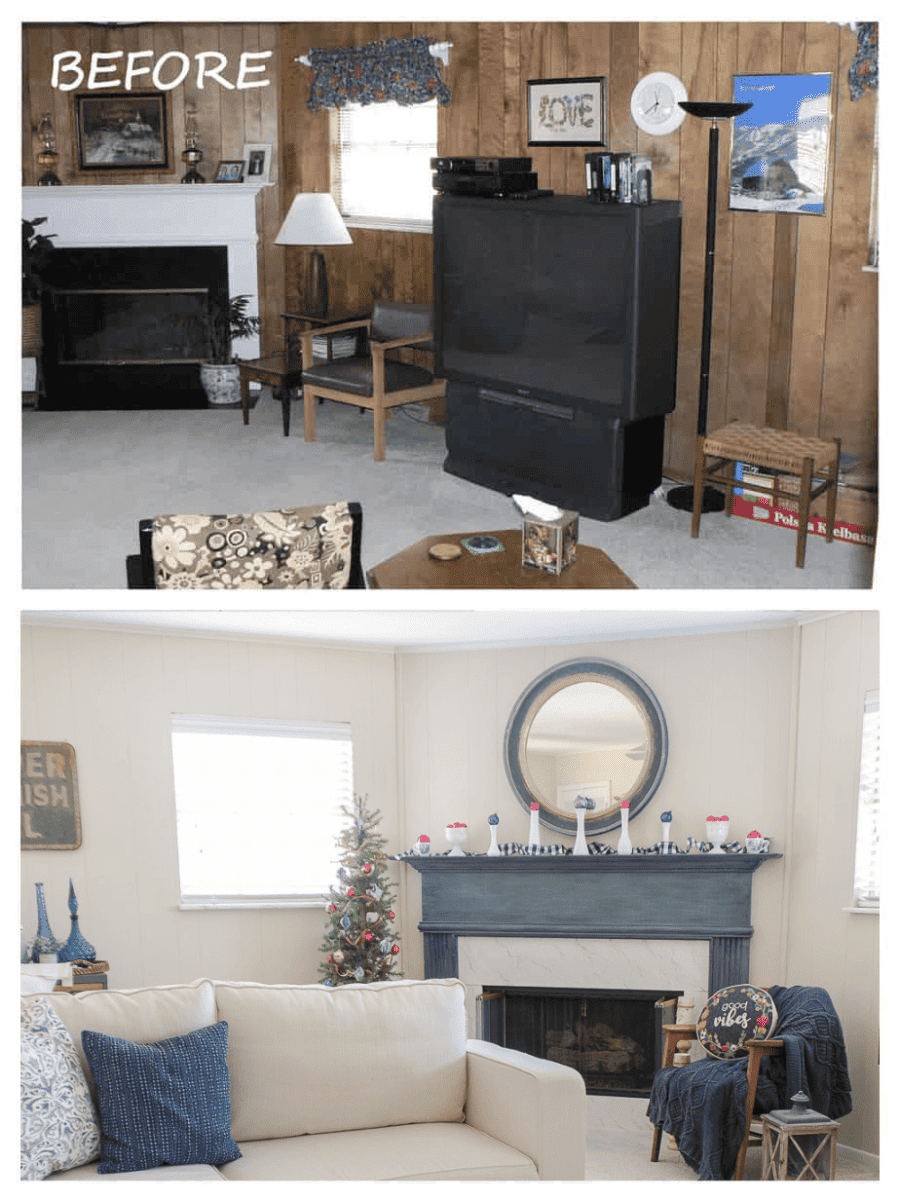
The top portion of the above picture was taken when we visited the house before buying it. I’ve actually painted the mantel and fireplace surround in here as well so it looks very different than it did when we moved in.
This paneling painting project was a 3 day process for me, but I’m slow and a bit of a perfectionist, and usually work alone. You could definitely complete the whole project in a weekend.
First of all let me say that if we had nice paneling with wainscoting and elegant details, I wouldn’t paint it. But since we live in a 60’s ranch style house and not a stately manor, I have no problem with painting it.
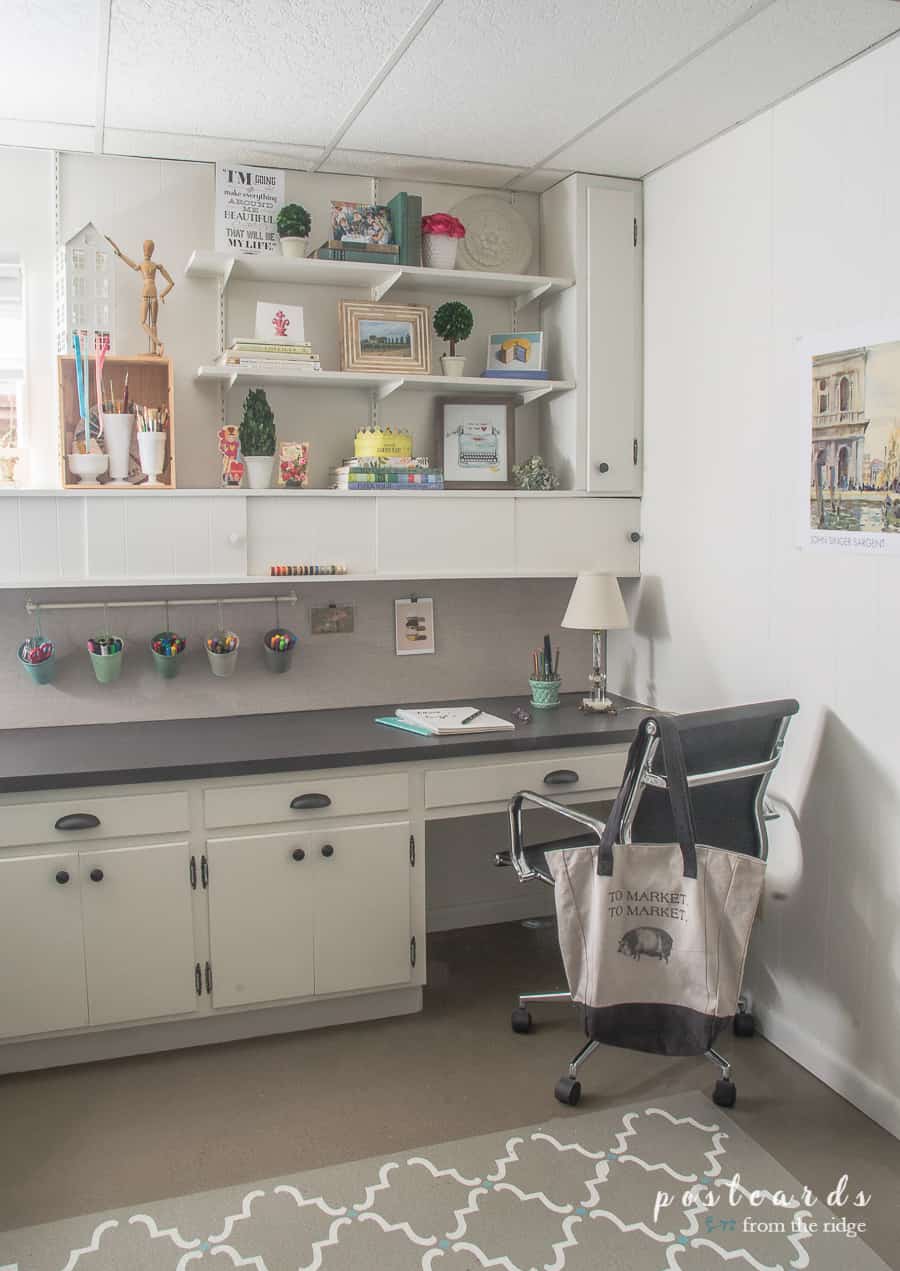
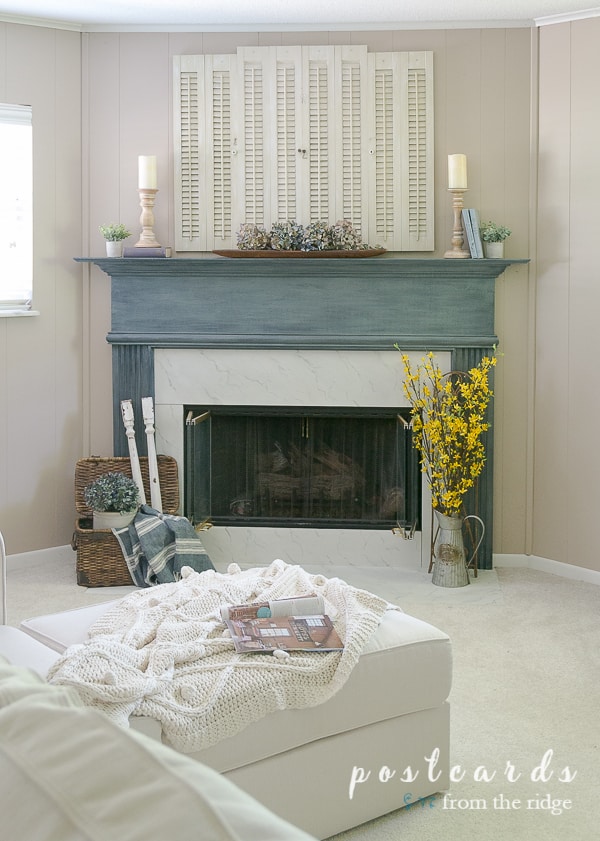
My basement craft room/studio/office also has paneling that I’ve painted and here’s a peek at that room.
The paneling throughout our house is the type that was mass produced in 4′ x 8′ sheets, very affordable, and was nailed to the studs in the wall. It’s your standard paneling from the 60’s.
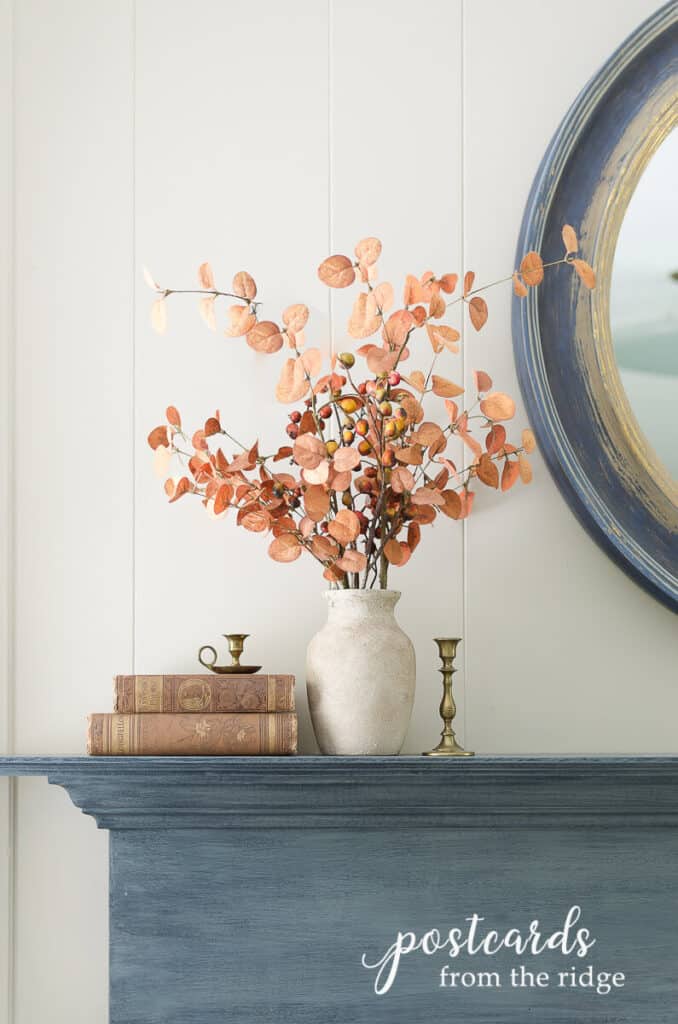
Close-up details of the painted paneling and mantel in the pictures above and below.
Some people don’t like the look of painted paneling because, let’s face it, it’s still paneling. But I don’t mind it and actually kind of like the cottage-y look and feel that it gives.
Design Choices – Our paint color is Benjamin Moore Clay Beige, trim color is Benjamin Moore Soft Chamois. Sources: Modular sectional sofa // Round mirror over mantel

Tips for choosing paint colors
Read my tips for finding the right paint color here: How To Choose the Right Paint Color
FAQ’s about how to paint paneling
No. You need to prime it first. Read on for details about which specific primer you’ll need.
After it’s primed, you can use any finish you want. See my guide to paint finishes here: Complete Guide to Paint Sheens with Free Printable Chart
Painting wood paneling can give an instant update to your home without the mess and expense of removing it and adding drywall. Painted paneling has a cozy, cottage-y look that many people find attractive.
You’ll need to clean and prime your paneling with specific products detailed below.
With these instructions you’ll still have the grooves showing since there’s no spackling involved. Read on for the complete how-to for the process.
This post contains affiliate links for your convenience. I may make a small commission on products purchased with my link, but your price does not change. For full disclosure go here: Disclosure and Policies. Thank you for supporting my site.
How to Paint Paneling
1. Determine what type of paneling you have
The first thing to do is evaluate the type of paneling that you have. Is it textured or smooth? Glossy or flat/matte? This will be important in determining the right primer to purchase.
*If it’s textured or flat (matte) paneling
If it’s textured/rough or flat/matte (no gloss) then you must use an oil-based or stain-killing primer to keep any stain from bleeding through on your finish coat. There are odorless and low odor oil-based primers available, so don’t worry too much about the odor. Or you can do the project on a nice day and open up the windows for air circulation.
I recommend this odorless primer.
*If it’s glossy and smooth paneling
If the paneling has a gloss or satin finish, you should be able to use a 100% acrylic high-adhesion primer. You can clean up your brushes and tools with water.
Test the Color
See all the options for sampling paint colors here: 5 Ways to Test Paint Colors
2. Remove everything from the room
Now that you know what type of paneling you have and which primer to use, you can buy your paint, primer, etc, and begin your project. But first, remove all the furniture, wall hangings, window treatments, and outlet covers from the room.
I use this handy tool for quick removal of outlet and light switch covers.
3. Protect floors with drop cloths
Lay plastic or canvas drop cloths over your floors to protect them from paint splatters. Plastic ones are disposable and cheap but can be a little slippery so be careful if you use those. Canvas drop cloths are more expensive but they never wear out and can be used for years.
4. Tape off baseboards
If you’re not painting your baseboards or moldings with the same paint as your walls, you’ll want to tape them off so they don’t get paint on them. (Go ahead and prime them while you’re priming the walls, though).
I use and recommend this painting tape for the cleanest lines.
5. Clean the paneling
You’ll probably need to clean the paneling before you begin painting. If it’s smooth and has a clear finish, I recommend something like this pre-paint cleaner to remove any wax or polish residue. It cleans and de-glosses at the same time and you can prime over it after 10 minutes. If it’s textured, there’s not a really good way to clean it other than spot cleaning any areas with a build-up of any dirt.
6. Patch holes and caulk cracks and gaps
Patch any nail holes with a good spackling compound and allow it to dry completely. After it dries, sand it smooth with a sanding sponge or sandpaper block.
If you’re using a light to medium paint color, I would strongly recommend caulking next to the baseboards and trim and in the corners because there’s usually a slight gap there. If you’re not painting the trim, or if you’re using a dark color on the paneling, it won’t be as critical because the gap won’t be noticeable.
I use Big Stretch caulk because it’s easy to work with and doesn’t shrink and crack over time like others do. I used it in our family room 15 years ago and it has never cracked!
7. Cut in around the edges
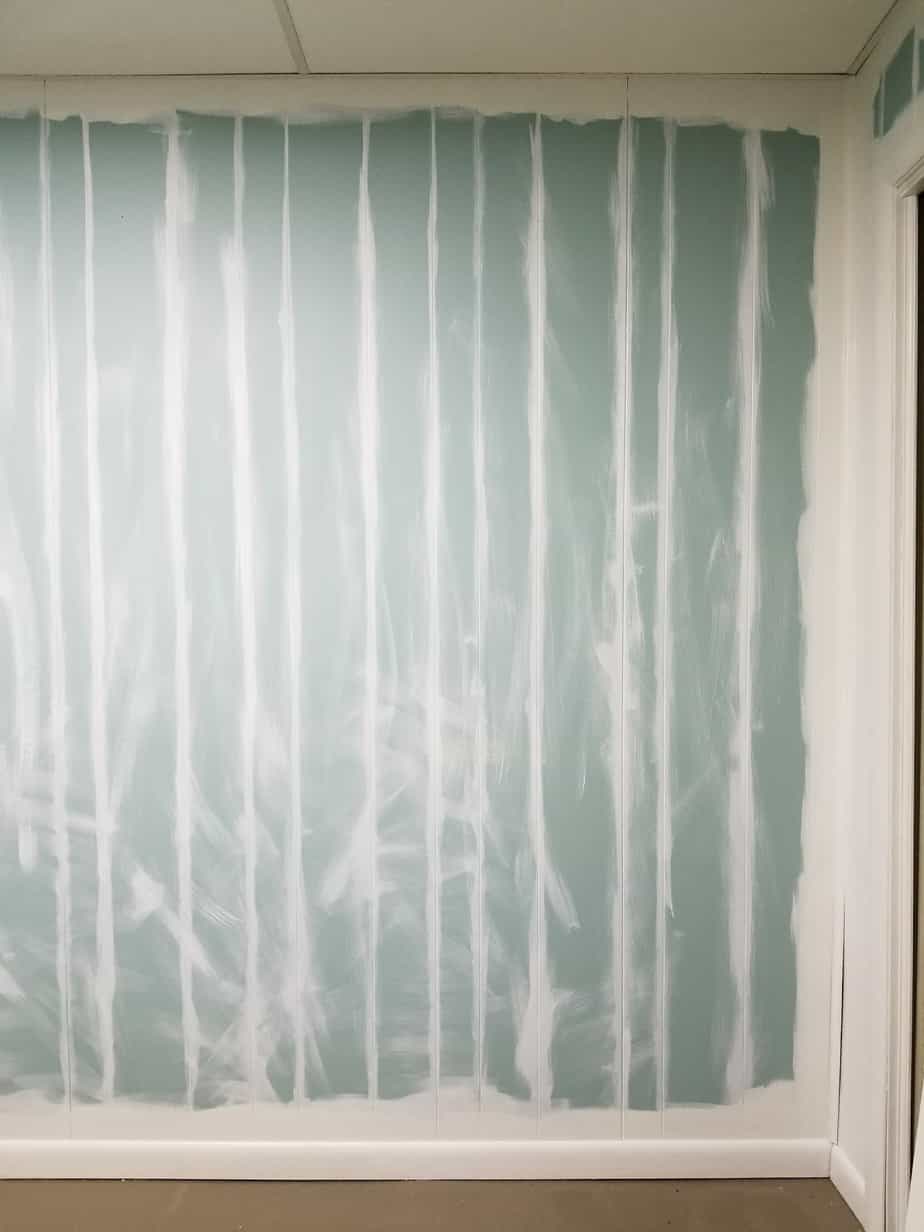
Once you’ve cleaned, caulked, and allowed the caulk to dry, then you’re ready to prime. Start by “cutting in”, or brushing the outer edges where the roller won’t reach.
It’s a bit more time consuming to cut in paneling than regular walls because you have to get the brush down into the grooves. And that’s not difficult, just tedious. I always us an angle tipped brush when I’m cutting in. The better the quality of your brush, the easier it is to use and the better your results will be. Trust me on this one.
Paint Like a Pro
Learn all the trade secrets from professional painters and save hundreds of dollars here: Beginner’s Guide to a Professional Paint Finish
8. Roll the walls
After you’ve cut in around the edges, use a roller to prime/paint the rest of the paneling. I always attach an extension pole to my roller frame when I’m rolling walls because it really makes the job easier and also reduces the strain on my back and arms.
My personal choice is a Wooster Sherlock pole. It adjusts in 6″ increments and locks into place. It’s fairly lightweight and very durable.
If your paneling has small grooves and little to no texture, I recommend a 5/16″, 3/8″ or 1/2″ roller cover. My favorite cover is a 5/16″ microfiber roller cover. It gives a velvety smooth finish and doesn’t spatter. I don’t even have to use a drop cloth, but I usually do anyway. And the best part? It doesn’t shed at all.
The 5/16″ nap works on our paneling because the grooves are small and shallow and the surface of the paneling is smooth, but if the grooves in your paneling are wide and deep, or your paneling is rough, you will need to use something thicker. If it’s textured or rough, I would use a 3/4″ cover.
If your paneling has wide or deep grooves, you can either paint the grooves with a brush or use a corner roller. The corner roller is quicker and easier. Just don’t load too much paint on it or it could leave a paint build-up on the flatter areas of the paneling.
Shurline makes an inexpensive corner roller that works well. I haven’t had to use this on our paneling since our grooves are the smaller type, but I’ve gotten good feedback about it from our customers.
Paint like a pro
See what the pros use for a beautiful paint finish in my Painter’s Toolbox Collection.
9. Apply the paint over the primer
After the primer dries, you’re ready to paint the paneling. Use the same technique as you used with the primer: Cut in and then roll.
You can use any finish you like, but my preference is Benjamin Moore Regal Select eggshell finish. Ben Eggshell Finish is a less expensive option that still gives a great finish and has good coverage.
I’ve used matte and flat finishes before and there’s nothing wrong with them, but I prefer the velvety look of the eggshell finish. I don’t use satin or semi gloss on walls because it’s too glossy for me personally, and it also magnifies any defects in the surface. That’s just my preference, though.
Guide to Paint Gloss
Learn all about paint gloss levels and where to use each one here: Ultimate paint Sheen Guide Printables
You may need 2 coats, depending on how the first one looks after it has dried. I usually apply 2 coats in all of my painted rooms. It just looks better and the finish is more even.
Once the paint dries, you’re done with painting your paneling! If you’re painting the trim, do that at this point. If it’s unpainted, it needs to be primed first. You should be able to use the same primer for the trim and paneling, and you can prime it all at the same time.
If you’re not painting the trim, the only thing left to do is clean up and then relax and enjoy the new look of your space. And if you’re like me, you’ll be asking yourself, “Why didn’t I do this sooner?”
How to Paint Paneling
Learn how to paint paneling like a pro with this tutorial. It's not near as expensive or difficult as you might think and can be completed in a day in most cases. It will give your home an fresh and updated look without the mess and expense of replacing the paneling with drywall.
Materials
- Primer
- Paint
- Caulk
- Sandpaper
- Spackling
Tools
- Roller
- Roller Covers
- Ladder or Step Stool
- Angle Sash Brush
- Extension Pole
- Roller pan or screen
Instructions
- Before your buy your paint and begin painting, you'll need to determine the type of paneling you have - textured or smooth, glossy or flat. For textured or flat paneling with no finish, you'll need to use a stain-blocking primer. If it's smooth or glossy, use a high-adhesion primer.
- Remove all furniture, window treatments, outlet covers, and wall hangings from the room.
- Protect floors with drop cloths.
- Tape off baseboards with painter's tape.
- Clean the paneling with this pre-paint cleaner and allow to dry completely.
- Patch holes with spackling and sand when dry.
- Caulk cracks and gaps with a non-shrinking caulk.
- Cut in and then roll each wall with primer.
- After the primer is dry, cut in and roll each wall with your finish paint.
- Apply a second coat if needed.
- Re-install outlet covers, window treatments, etc. and move all the furniture back in after the paint is dry.
Notes
See the full blog post for very detailed instructions for each step.
I hope this post helps you in your paneling painting project. It’s a project that’s definitely worth the effort.
Let me know if you have questions, and if you paint your paneling I’d love to hear how it turns out!
Thanks for stopping by, and have a great day!

More Painting Tutorials


Angie – wow, what a transformation – it looks fab! Great tips!
Thanks Erica! Have a great weekend! ~ Angie
Your before and afters are WA-LA amazing !!! love it all . Thanks for sharing this .. Just really enjoyed it .. HUGS
Thanks, Sherry!
You did a wonderful job transforming that room with paint! It looks really good! I am actually glad you posted this as our living room is paneled and has been painted once already (& didn't know what they were doing!) so we have quite a challenge on our hands in fixing it up.
Thanks, Jen! It's not too difficult, just a little time consuming. Good luck! ~ Angie
Amazing! Thank you for the tips! We are planning a facelift on home from the 60's that we will be using as our new office, every single wall has paneling. We have want our space to be welcoming, comfortable and fabulous! I can't wait to get started. I am inspired!
Sounds like a big project for you. Good luck with the painting and the business! Thanks for stopping by! ~ Angie
I live in a 1979 double wide mobile home it has light color paneling I have wanted to paint the paneling but kinda scared to do it afraid I want like it I might try to paint it this spring I like the way your painted paneling looks wish me luck
Good luck!
Thanks for the pics! I have finally convinced hubby to bite the bullet and paint the paneling! If it turns out even half ass pretty as yours we are fin!
Good luck! It will completely change the look of your space! Thanks for stopping by. ~ Angie
Good Morning Angie!
I have nominated you for the Liebster Award-as you know it is a honor for new bloggers!! Please visit athomewithjemma.blogspot for all the details!!
Again congrats!!
jemma
I really love the color you have chosen. Would you please share the name and maker of it?
Hi Jamie. The wall color is Benjamin Moore Pismo Dunes and the trim color is Benjamin Moore Soft Chamois.
My whole house is panel – so I can't wait to get painting!
Good luck! It's not too difficult but it makes a world of difference. Let me know how it turns out! Thanks for stopping by and leaving a comment. ~ Angie
Your after pictures are just lovely! We do not have paneling in our home but my in-laws do and they have done lots of painting. Your post is such great inspiration for those who feel overwhelmed by their paneling! Very pretty make-over!
-Rebecca
my house is all paneling from the 70's. ty for the tips, especially about the cleaners and various different paneling types. would like to add something for you to try. a sponge brush for the lines, like the kind you mod podge with 🙂 i have had great success with the sponge brush filling in those tedious gaps. luving your before and afters as well. i always forget to snap the before pic lol
We just put a contract on a house that is raging '70's! And I was so tickled when I saw you work at Kittrell's! My mom always bought ALL her painting supplies from your store when she was alive back in the 80's and early 90's 🙂 Good memories! Can't wait for closing so I can get to painting!!
I painted the paneled walls in our bedroom several years ago. I used a water based primer and flat paint. It worked well. I prefer waterbased b/c of the vocs.
Do you think a paint and primer in one would work? Or would it be best to do them separate?
Hi Nichole. In this case, a separate primer followed with paint would probably work better. The paint with primer works great when you're changing colors, but you still need an actual primer over unpainted surfaces. ~ Angie
Our entire basement is wood paneling and I can't wait to paint over it all! Ours has some spots where the paneling is kind of bowing out–it's not flat against the wall. Did you have any spots like that? If so, did you fix them, or leave them?
Looks great! I've heard problems with cracking after awhile, did you have this happen at all?
Looks great! I've heard problems with cracking after awhile, did you have this problem at all?
Love, love, love it!
Do you have a section that describes how you painted the fireplace mantel, including the color? Thank you
I’m also interested in knowing if you have a tutorial for how you painted your fireplace mantel. I’d like to paint mine and white wash the brick. I’d love to know the paint colors and technique you used. Thanks!