
How I Updated a Countertop with Wood-Look Contact Paper
Counter top makeover with contact paper
This post contains affiliate links for your convenience. For full disclosure go here.
Do you have an ugly counter top that you’re tired of looking at? Do you love projects that don’t involve power tools? Then this contact paper counter top makeover project is for you.
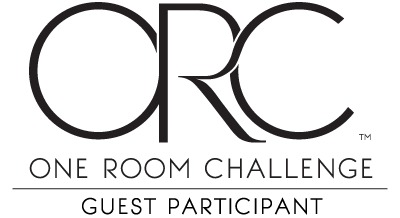
Last week I announced that I’m joining the One Room Challenge and giving our family room a makeover. I shared the plans HERE for the room and some “before” pictures, including the 1960’s built-in bar with the avocado green counter top. Here’s a picture of it in all it’s glory.
Ain’t she a beauty? Ummm, no. But this project was low on my list of things to update in our house. Never mind that we’ve been here almost 13 years and I still hadn’t gotten around to doing anything to it.
Do you ever have projects that never seem to get done, and when you finally do them you ask yourself what took you so long? It happens to me all the time.
Anyway…..I’m going to share what I did and what I used for this simple counter top makeover.
Note – This counter doesn’t get heavy use like a kitchen or bathroom counter would. I don’t recommend contact paper for a long-term fix, but if you just can’t stand your counter any more it’s a great, cheap fix.
I don’t normally use contact paper. In fact, I don’t really like it on most surfaces. But for an ugly laminate counter, it’s the perfect low-budget solution.
Counter top makeover with contact paper
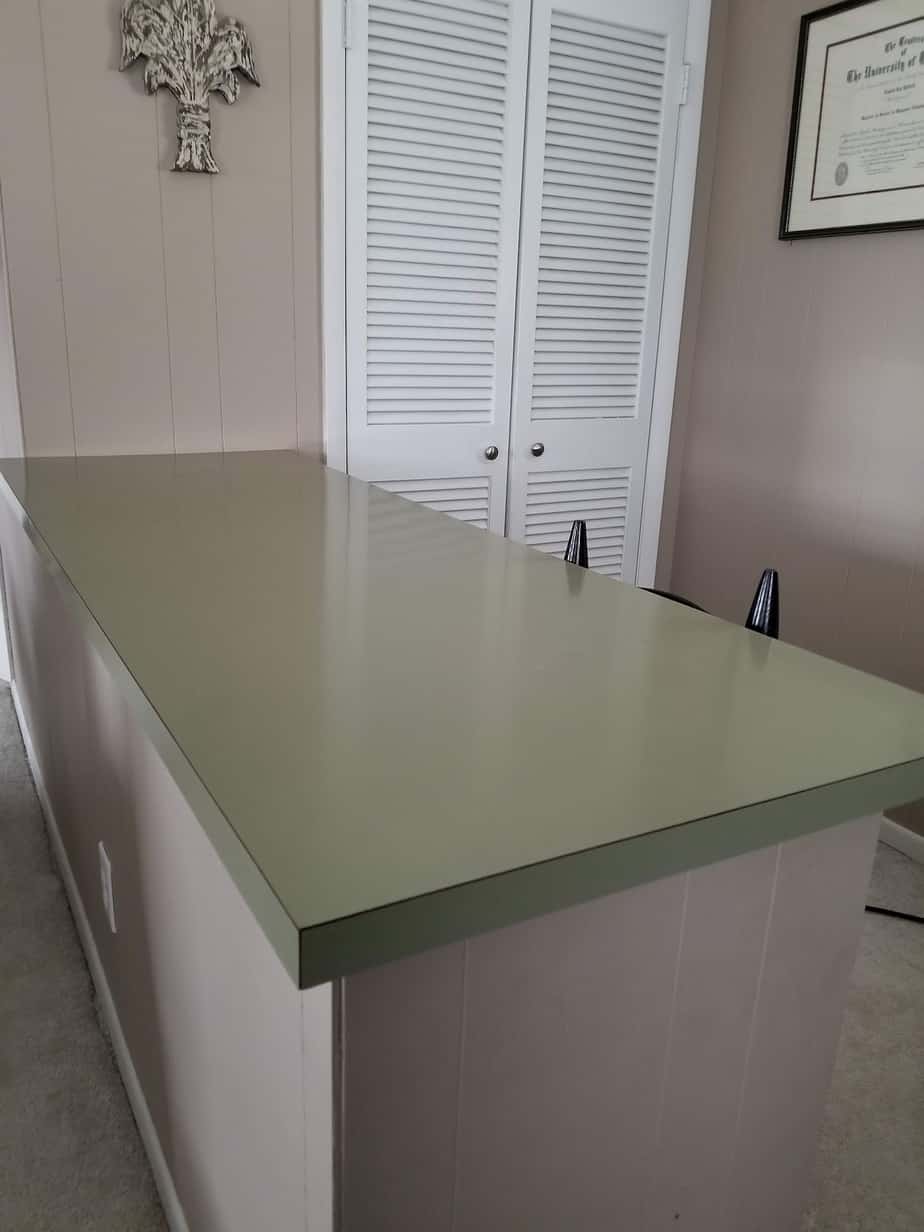
Supplies needed:
Before you start this project or any other one, be sure you have everything you need. You probably have most of these supplies on hand but here’s the list of necessary items:
- Wood-look contact paper – I used this one ==> Wood Look Contact Paper
- Smoothing tool
- Scissors
- Utility knife
- Straight edge (optional)
- Measuring tape
Covering your counter top with contact paper
Contact paper is not too difficult to work with. If you’re patient then you can get contact paper to line up straight and not have a lot of air bubbles. Try not to reposition it too many times or you could stretch it and cause it to have wrinkles.
1. Clean your surface
Clean the counter top with a non-greasy cleaner and remove any leftover residue with a lint-free cloth. Make sure it’s nice and clean with no uneven areas.
2. Measure twice, cut once
I’m speaking from experience as you’ll see below.
Measure the length of the contact paper plus the edging and cut your strip about 1 – 2″ longer than that.
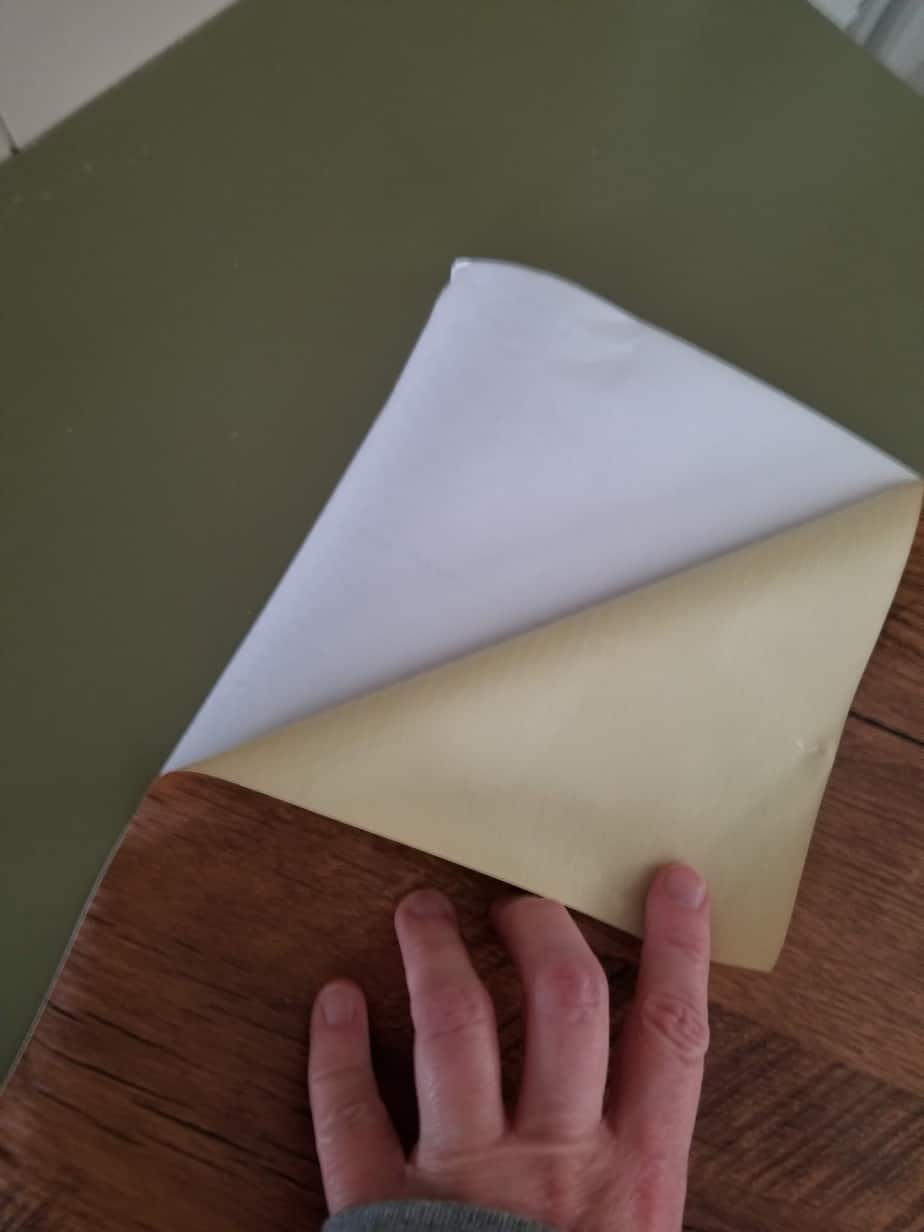
3. Peel and stick
Peel back the first few inches of the backing and press the contact paper edge next to the wall, making sure it’s straight. After the first few inches are positioned where you want them, slowly continue to peel the backing as you press the contact paper to the laminate.
Use the smoother or a very stiff credit card to smooth out the air bubbles, working from the middle towards the edges.
Note – don’t use anything metal to smooth out the air bubbles or you could scratch the surface of the contact paper.
4. Trim the edges
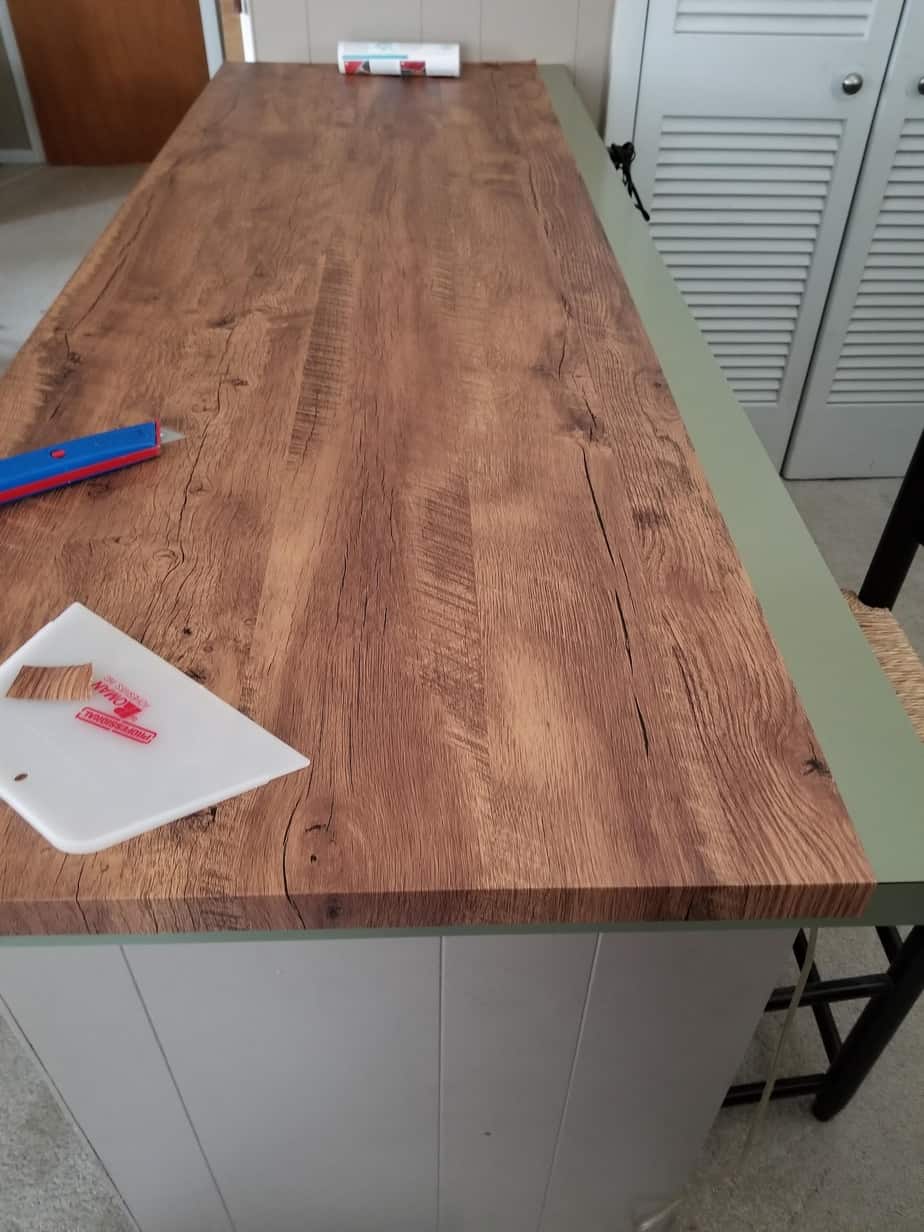
Here’s a great example of why you measure twice and cut once. My strip was about 1/2″ too short. I’d be lying if I said I didn’t use some four letter words at this point. I didn’t have enough contact paper to replace the strip so I had to do some extra work because of my mistake.
If you measure and cut correctly, you should have a little bit of the contact paper extended past the bottom of the edge that you would trim off slowly and carefully with a sharp utility knife. Since I didn’t, I ended up having to cut off the overlapping piece and replace it with a small strip that was the correct size. Measure twice, cut once and this shouldn’t happen to you.
5. Add your next piece
If you can find the pattern repeat, match up the pattern at the seams before you cut your next strip.

You’ll want to cut it the same length as your first strip, assuming you cut it to the right length. It likely won’t need to be the full width, so you can trim it down to the width you need, plus an inch or two, before you begin sticking it to the laminate. It’s easier if you don’t have a lot of extra to deal with.
Butt the seams together as closely as possible, but don’t overlap the strips or you’ll have a slight ridge where they overlap and it won’t look as good.
I didn’t have enough length on my roll to get 1 continuous strip so I had to piece my 2nd one, but you can’t tell at all. I did overlap where I pieced them together, and then cut through both layers with a sharp blade and removed the excess so it would lay flat.
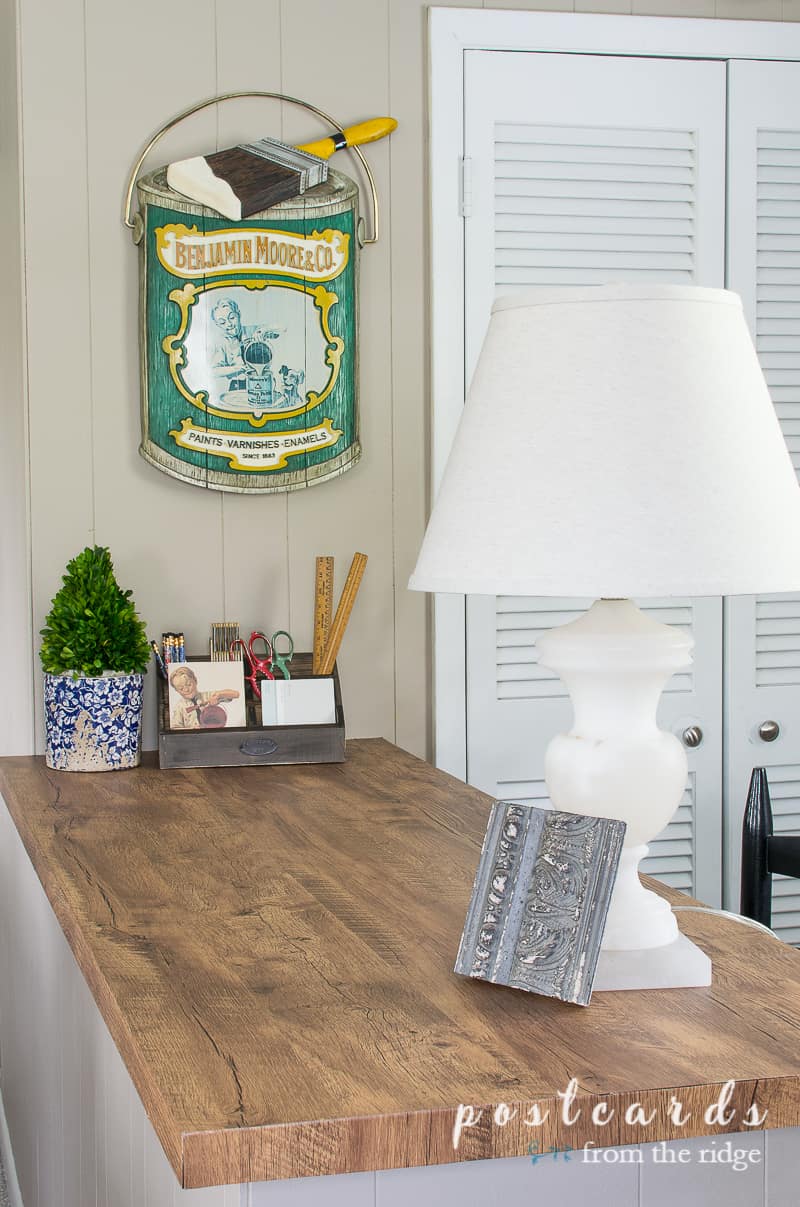
Here’s the finished project:
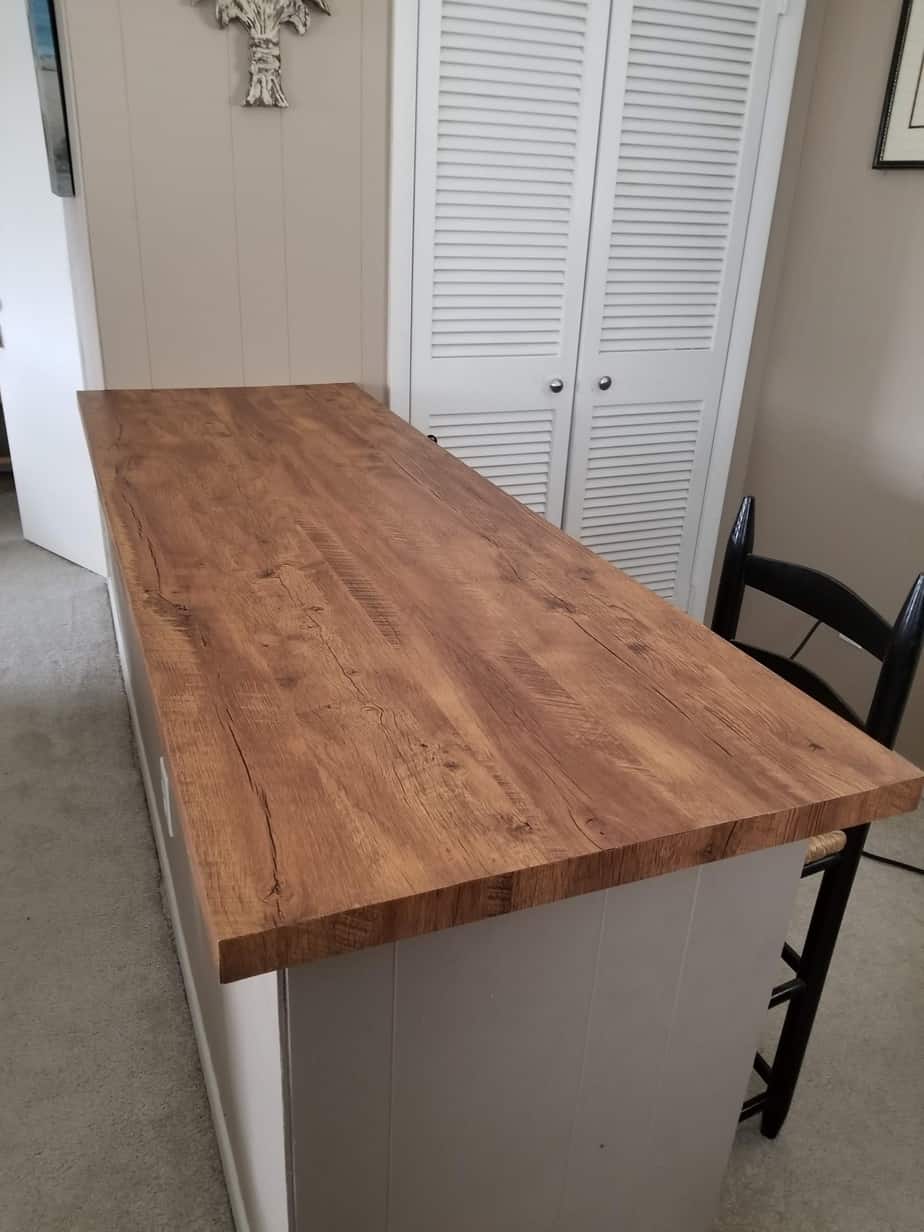
I took a photo from overhead to try to show the pattern of this particular peel and stick paper. It’s a little more rustic than I wanted, but it still looks so much better. And for less than $20, it looks amazing, if I do say so myself!
Note – if you have some air bubbles that you can’t smooth out, take your utility knife and gently make a slit in the air bubble, then carefully use your smoothing tool over it and the air bubbles will be gone.
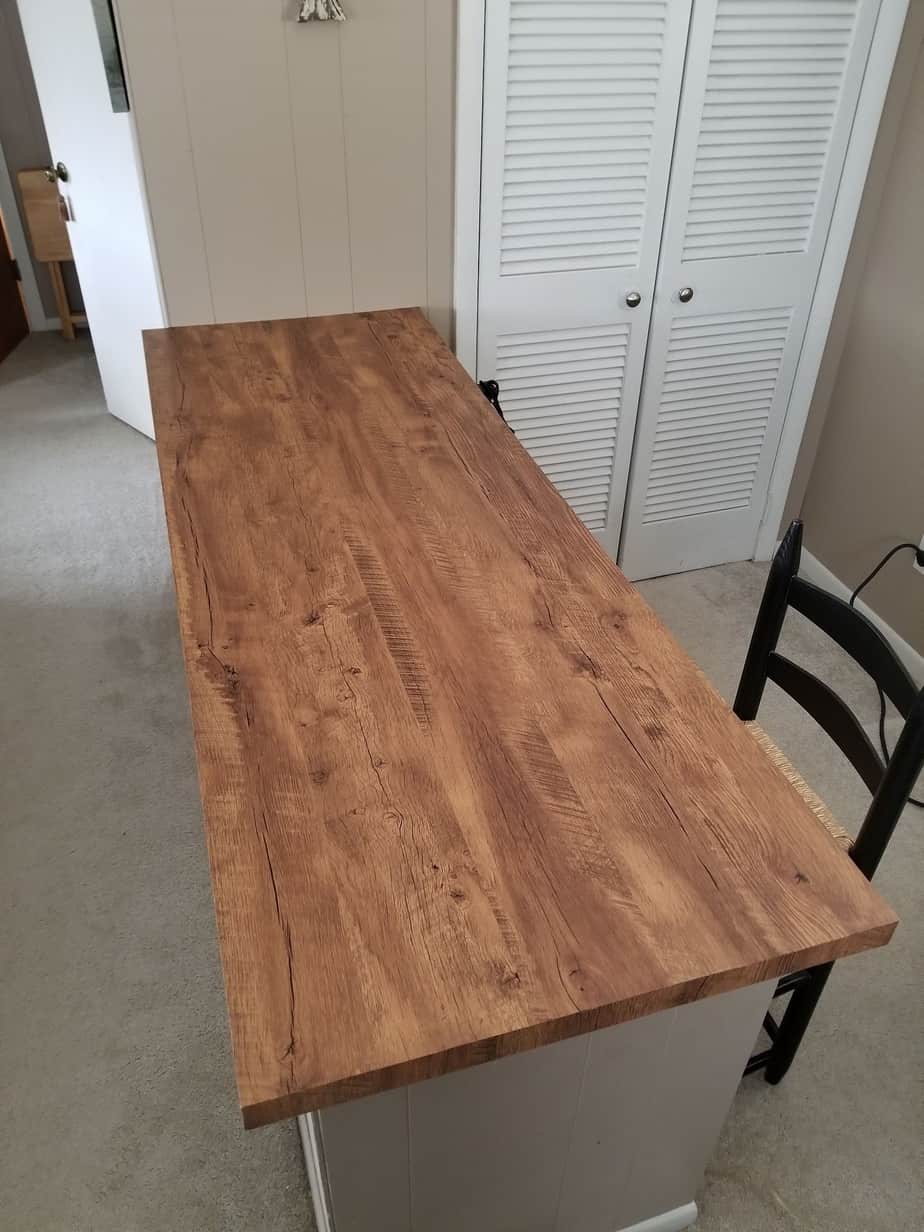
Here are some better photos that I took with my camera and not my phone:

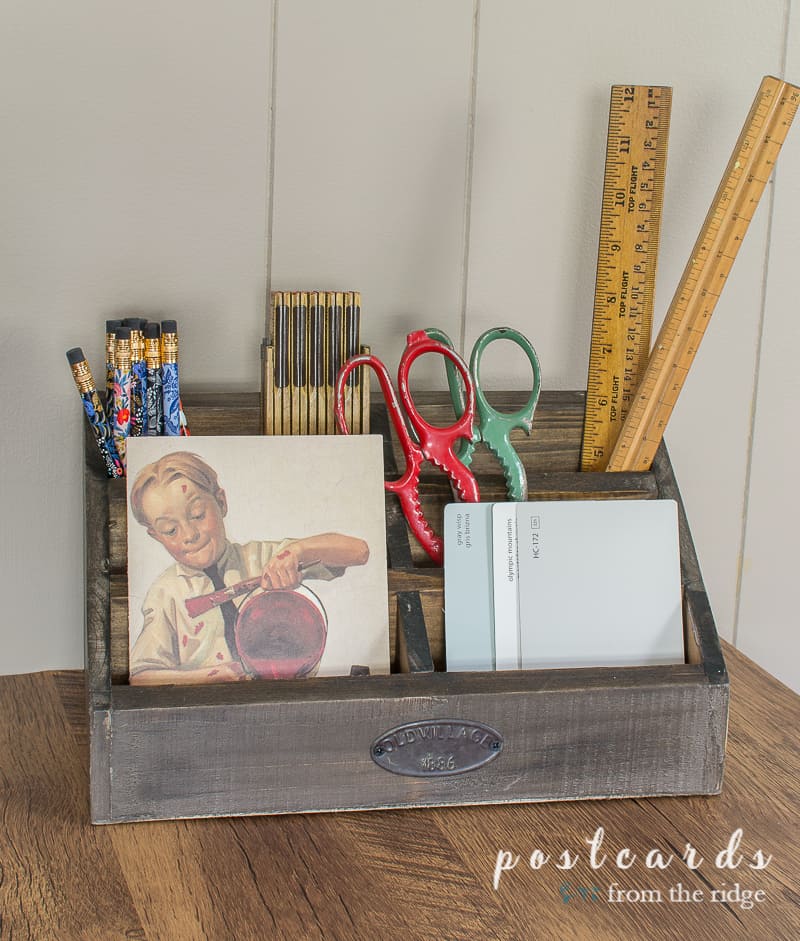
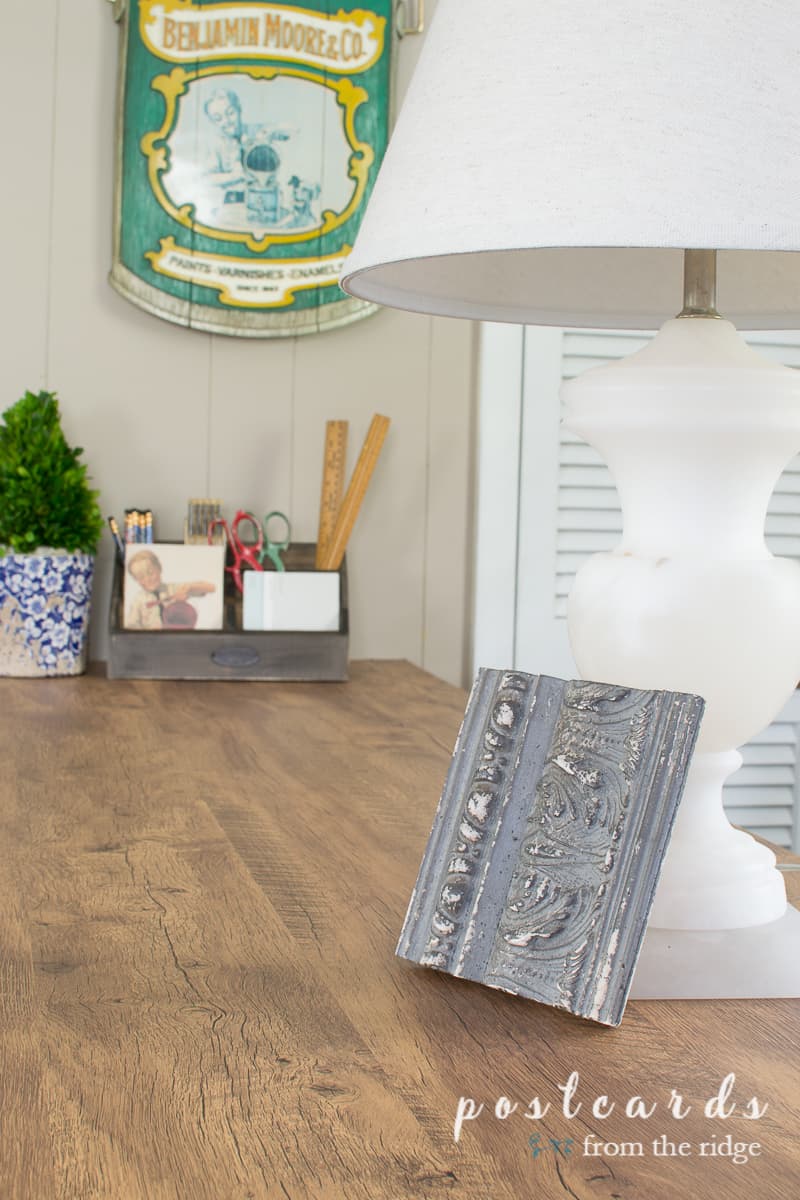
I decorated the counter with my vintage paint store ad sign, wood letter organizer, wood rulers, scissors, some floral pencils, a blue and white planter with boxwood, and a few more little things.

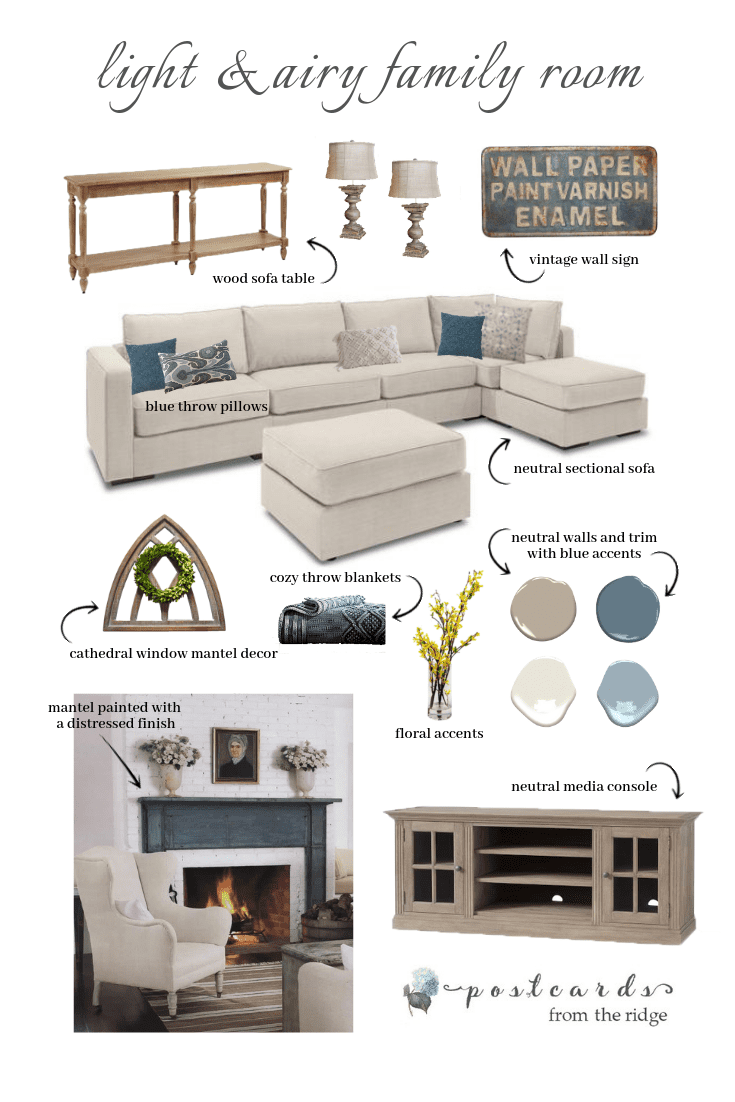
In case you missed the plan for the room last week, I’m sharing another look at it below. I got the vintage inspired sign this week (woohoo!) and it looks just as good in person! If you’re wondering why I have paint signs in here, it’s because my family owned a paint and wallpaper store for nearly 40 years in my hometown, so it’s a sentimental thing for me.
Click for sources
Paisley Pillow Cover // Blue Pillow Cover // Stonewashed throw blanket //
Macrame pillow cover // Ikat blue pillow cover // Sectional // wallpaper sign //
foyer table // media console // lamps
A reader emailed me to ask if I was going to use a new rug in here. Since the room is carpeted I’m not planning to, but just in case it needs more color after all the other updates I’ve bookmarked my favorite ones for this room HERE.
Stay tuned over the next few weeks for a makeover of our built-in bookcases, media console, fireplace, and the final reveal of the room with all the new furniture and decor. I can’t wait!
See my tutorial for how to paint paneling like a pro HERE.
Lots of before and after projects can be seen HERE.
Unbelievable…this is so good to know!
I AM SHOOK!!! That is contact paper?! It legit looks like real wood and would have fooled me anyday! Well done!
Contact paper has come a long way in patterns, this one looks great. I know I did with desk top 22 years ago when I first married and we had absolutely no furniture and my choices we so limited, I ended up just using black, LOL. This however looks like really wood which is amazing, like butcher block almost.
It looks so good! I have used contact paper in the past, too…most recently on a dishwasher panel I couldn't stand for another day. It's an inexpensive fix! Great job!
Thanks, Linda. Yes, such a great inexpensive fix. A dishwasher would be a great place for it too. Very clever!
It looks fantastic!! I love the wood pattern on the contact paper. Such a smart fix!
Thanks, Emy! It looks just like a rustic wood but I didn't have to use any power tools! Yay!
First off- I LOVE that Paint can sign! It is such a great accent. Second- I too have mis-cut the contact paper in the past. Live and learn. Third- the end result is just wonderful! It looks really good and was overall an easy fix. Looking forward to your complete room
Thanks, Jackie! The sign is very sentimental since it was in my parents' shop for years. I'm so happy to have a good place to hang it. And yep, measure twice, lol.
This turned out to look amazing. In our TV room is a countertop covered in formica. Yes – THAT formica. Oh, and it's orange! I have never even considered using contact paper to cover it, but you have definitely given me another option besides chalk paint to consider. The wood-look is very natural and I am sure will help make the room feel warm and welcoming. Great tutorial!
Mmmm. Orange formica. You can definitely give it a fresh new look with contact paper. I don't know why I waited so long to cover this one!
Contact paper i never would have guessed, very clever.
Thanks, Marlene! I love finding simple solutions and this is definitely one of those!
Angie, this is bananas! I can't believe that is contact paper. You are totally blowing my mind. It looks so good. Cheering you on as we enter Week 3, CoCo
Thanks, CoCo! I didn't know contact paper looked this good until I got this one. I'm a believer now!
Angie, that looks amazing! Would never have guessed it is contact paper! Eleanor
Thanks, Eleanor! It even has the texture of real wood!
I would have never thought of contact paper, but it really looks good. Nice job!
That was the perfect choice to update that countertop! It looks great!
Thanks, Joannie! It looks so much better than the 60's green!
I love a cheap and easy DIY! I can't believe this is contact paper; it looks so good!
Thanks, Mary! I love cheap and easy DIY too! And it really does look like wood.