How to Paint a Vinyl or Linoleum Floor the Right Way
Transform your old vinyl floor with paint and a stencil
This post contains affiliate links for your convenience. For full disclosure go here.
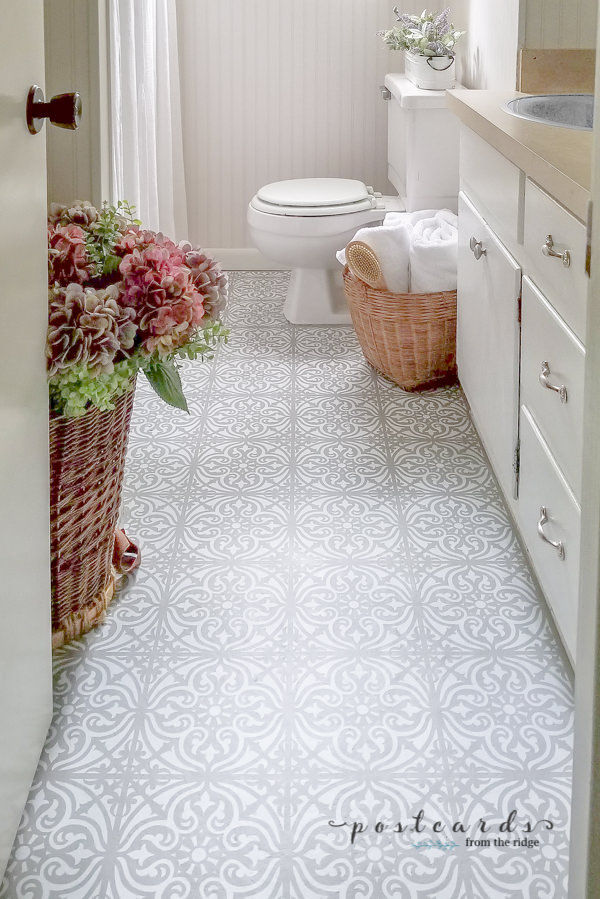
How to Paint a Linoleum Floor
Are you tired of your dated vinyl or linoleum floor? Painting a linoleum or vinyl floor can definitely be done. You just need to be sure you have the right products and prep the floor correctly.
Will it last forever? No, but nothing does and this should last several years if done properly.
So if you can use a paint brush and roller then you can definitely do this DIY project and give your old linoleum floor a fresh new look without any grout, saws, or tile.

Last week I shared a tutorial for making your own stencil with a Cricut Maker and now I’m sharing a detailed supply list of the painting portion of the project. For detailed instructions to create a stencil with a Cricut Maker, go to this post:
How to use a Cricut Maker to create a custom stencil
Supplies Needed for Painting a Vinyl Floor:
For Painting Portion:
- TSP
or Similar Cleaner - High Adhesion/Bonding Primer
- Floor Paint in 2 colors
- Clear Acrylic Sealer
- Roller Handle
- Roller Covers
- Extension Pole
- Roller Pan
- Pan Liners
- Safe Release Painter’s Tape
- Brush for around the edges
- Knee Pads
or Knee Cushion(Optional but recommended)

For the DIY Stencil:
- 6 mil mylar sheets
- Cricut Maker (or
self-healing mat
and
X-acto Knife) - Fresh Blade
for Cricut Maker - Cutting Mat
- repositionable adhesive spray
How to Paint a Linoleum or Vinyl Floor
1. Clean the vinyl floor and tape around the edges
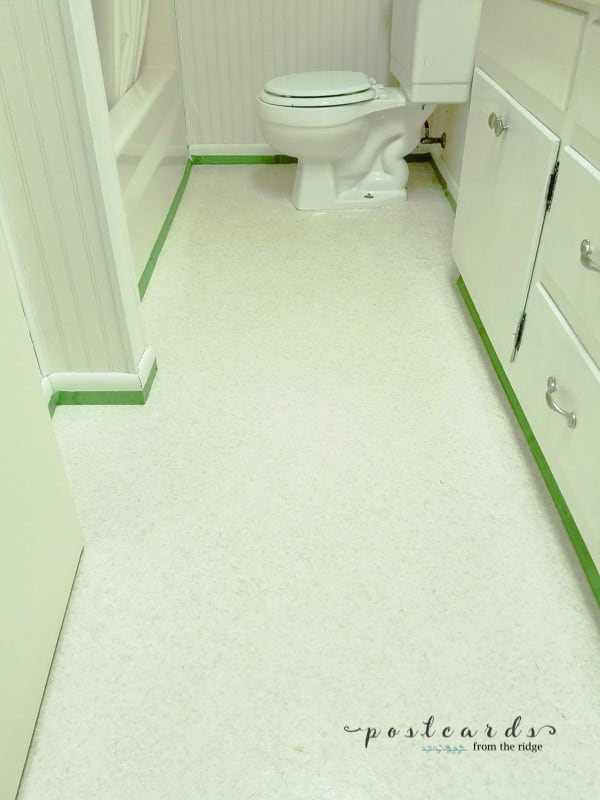
Cleaning the vinyl floor is one of the most important steps to this project. If the floor isn’t clean or if there is residue on it, even the best primer or paint won’t stick to it. For my floor project, I used my Shark Steam Mop over the floor twice.
If you don’t have a steam mop, I recommend cleaning it with TSP. Follow the instructions on the bottle. Allow to dry completely.
2. Apply primer or base coat
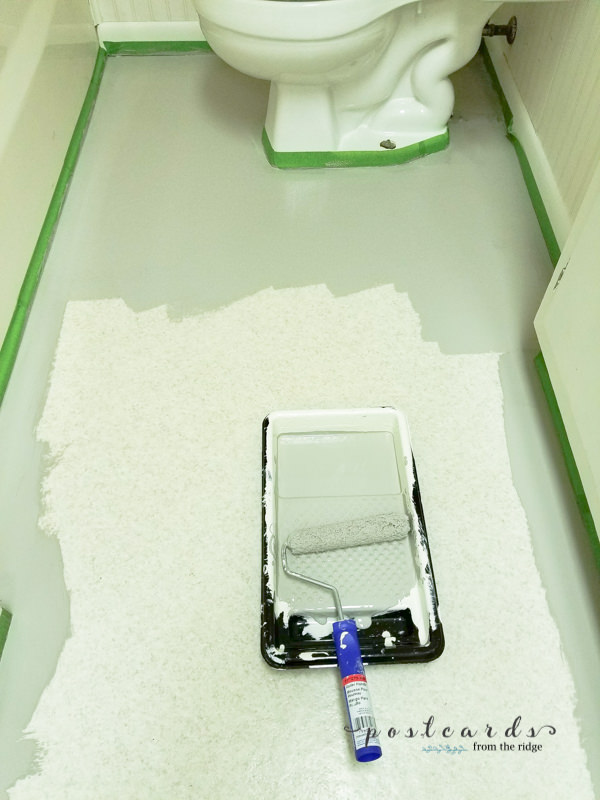
For my project, I used an adhesion primer and tinted it to a gray so it could be used as the base coat for the tile pattern. There are some newer products for floors that don’t require primer,
like this floor paint from Rustoleum. Two coats will probably be needed for this step.
3. Stencil the floor

You can skip this step if you want and simply have a solid color floor. But every little hair or piece of dirt will probably show up on it.
If you choose to stencil, you’ll want to tape off the edges of each section, allow it to dry, then move on to the next section. Continue until you finish the entire floor. Leave the edges until last and you can cut down the stencil for those smaller areas, doing the smallest ones last.
I made my stencil using my Cricut Maker, but you can purchase beautiful pre-cut
stencils here:
4. Add a Clear Protective Coating to the floor

After your design has dried completely, add at least 2 coats of a clear acrylic protective coating to the floor. This will protect the floor from water drops and make it easier to clean. I used a Clear Dead Flat Varnish because I had it on hand and have used it on floors before that don’t get much use.
In bathrooms that get daily use, I recommend this Clear Floor Coating for maximum protection and durability.
Allow it to dry completely between coats and before walking on it.
Questions and Answers about painting a floor:
- How durable is it? If you prep the floor properly and use the correct paint and primer it will be very
durable and could last for years. - Can I use chalk paint on my floor? Chalk paint is great for accent furniture pieces and decor items, but I don’t recommend it for floors, cabinets, or exterior surfaces. It’s soft and porous and is not durable, even with a wax finish.
- Is it waterproof? The floor finish I recommend above is made for floors and will be water resistant. This means that it should hold up to normal, light drops of water from showering or washing your hands.
- Is it stain resistant? It will be resistant to any stain that a clear floor finish would be.
- How do I clean it? Test any cleaning method in an inconspicuous area before doing the entire floor. I would recommend using a damp mop and a solution of 1/2 cup vinegar and 1 gallon of warm water.
- Can I paint over it? Yes! You’l want to use the same prep/cleaning methods and paint products you used for this project.
Honestly, you can paint almost any surface if you use the right products and procedures. Consult with your local paint store and they can recommend the correct products for all of your painting projects.
See more of my painted projects in these posts:
How to Paint Your Brick Fireplace

How to Paint a Laminate Countertop
How to Paint Paneling

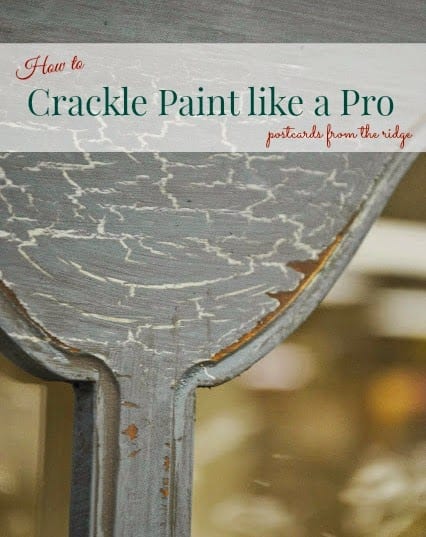
How to Crackle Paint Like a Pro
Let me know if you have any questions or if you have an surface that you’re not sure how to paint. Maybe my next tutorial will be about that!
Have a great day.

Angie,
This loojs great and offered very helpful information.
Cindy
Great job! I did this over 15 years ago and it's still going strong. The trick is putting on 3 top coats if you want it to last and touching up with the top coat again if needed. Back then I had to hand cut my stencil. I'm still recovering – lol.
Are you pinching yourself everytime you walk by? It looks so fantastic! You did a great job and I had never considered using my Cricut to make the stencil! Brilliant!
Hugs,
Lynn
Angie this bathroom floor look fabulous! Thanks for sharing at the Tuesday Turn About Link Party. I'm excited to feature your post this week and hope you will come back to join us!
Angie, I absolutely love this floor! The fact you made your own stencils, you're my hero lady! xo
Wow, your floor looks stunning and so unique. Love it!
Oh my goodness, it looks amazing Angie. WOW!!!