Paper Heart Wall Art
Paper heart 3-D wall art
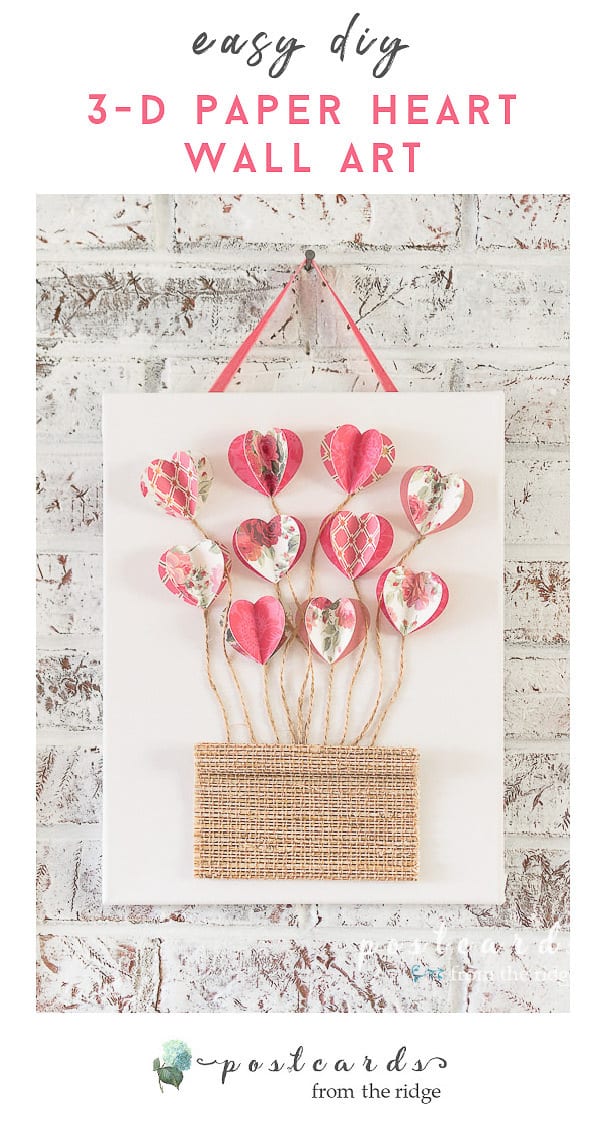
Paper Heart 3-D Wall Art
Today I’m sharing a fun little 3-D paper heart wall art project that you can make in less than 2 hours. The supplies are pretty simple and you probably have some of them on hand already. It’s a great way to dress up a wall or shelf for Valentine’s day.
You can see my favorite Valentine’s day decor from last year here:
A Paper Heart Garland and Vintage Decor for Valentine’s Day
This is my project for this month’s Thrifty Style Team challenge, hosted by my friend Julie at Redhead Can Decorate. We’re a group of creative bloggers who share ideas for decorating your
home on a budget.
There are helpful tips, clever ideas, and lots more each month. All of this month’s submissions are at the bottom of this post so be sure to visit everyone!
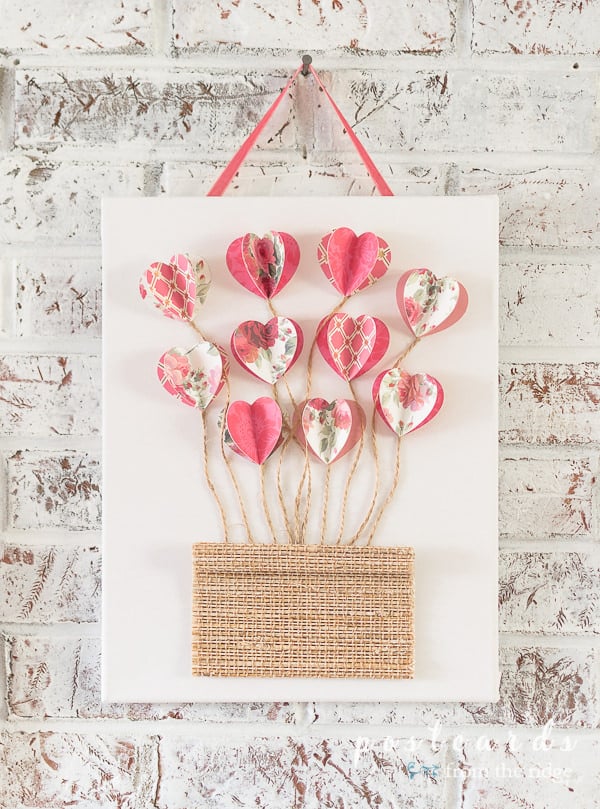
My little art project was supposed to be a hot air balloon with heart shaped balloons, but it looks more like heart shaped flowers so I’m just calling it 3-D art, lol.
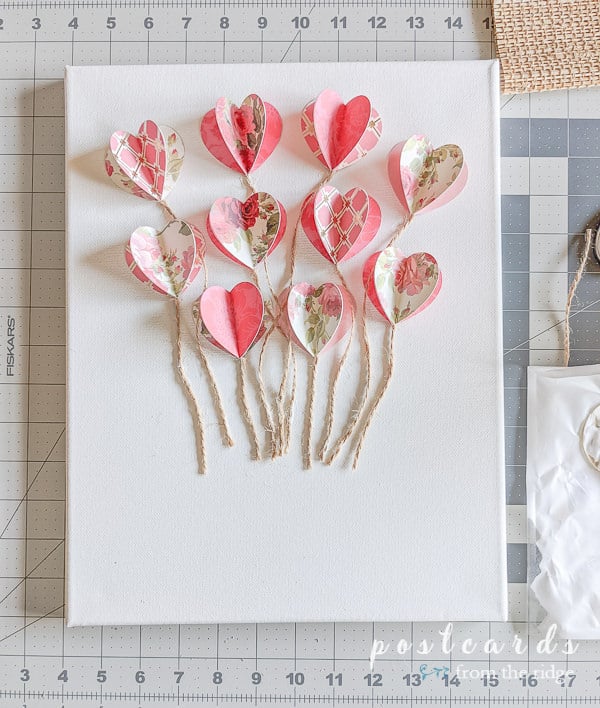
I think it would look more like a hot air balloon if the string pieces were straight but I didn’t figure that out until after they were glued into place. Sometimes you have to reimagine things a bit in life, I guess!
Here’s how I made my paper heart 3-D wall art!
Supplies Needed:
- Cricut Maker or Paper Heart Punch
- Floral Cardstock Paper
- Mod Podge
- Glue Gun
- Glue Stick
- Twine or Jute String
- Blank Canvas
- Small Piece of Grasscloth
- Scissors
- Small brush to apply glue
- Pink Velvet Ribbon (optional)
How to make paper heart 3-D wall art
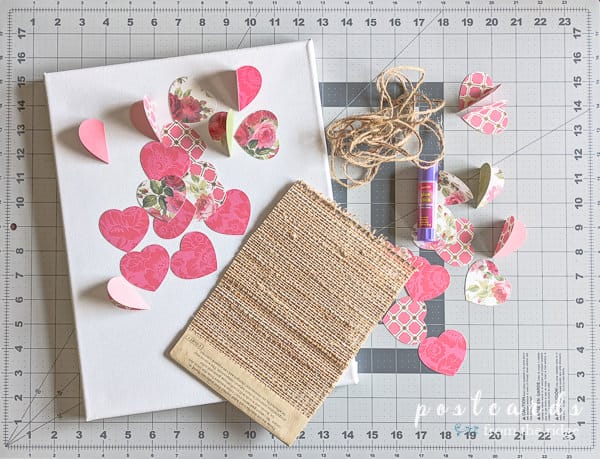
1. Cut hearts and glue them together
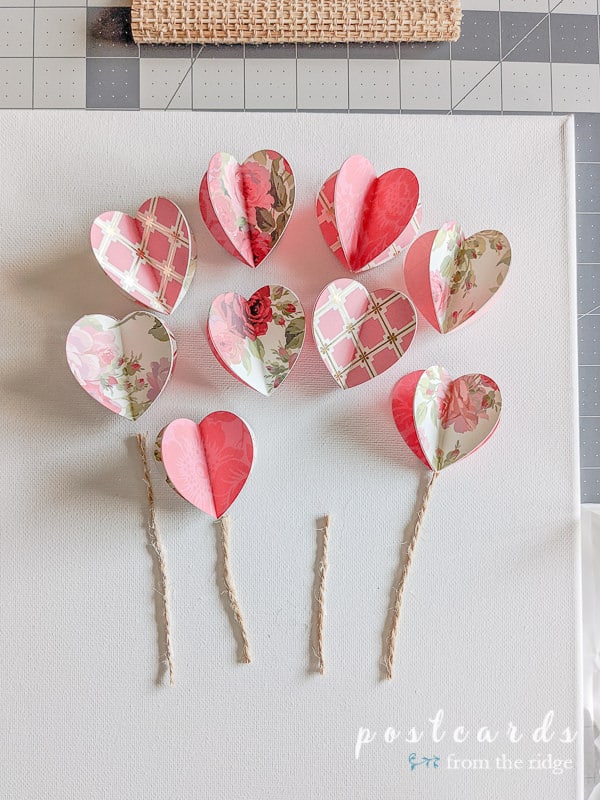
Using my cricut maker (you could also use a paper heart punch), I cut 30 2″ hearts from some floral paper I had bought on clearance. I folded them in half and glued them together in 3’s, using a glue stick.
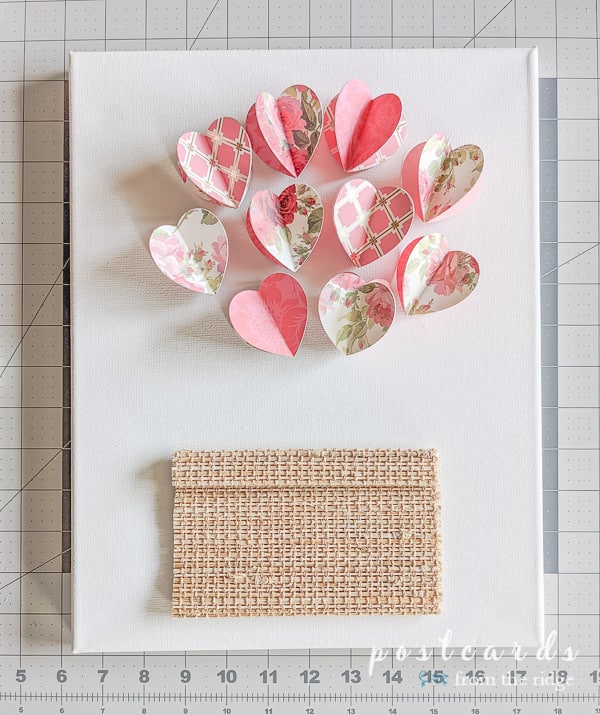
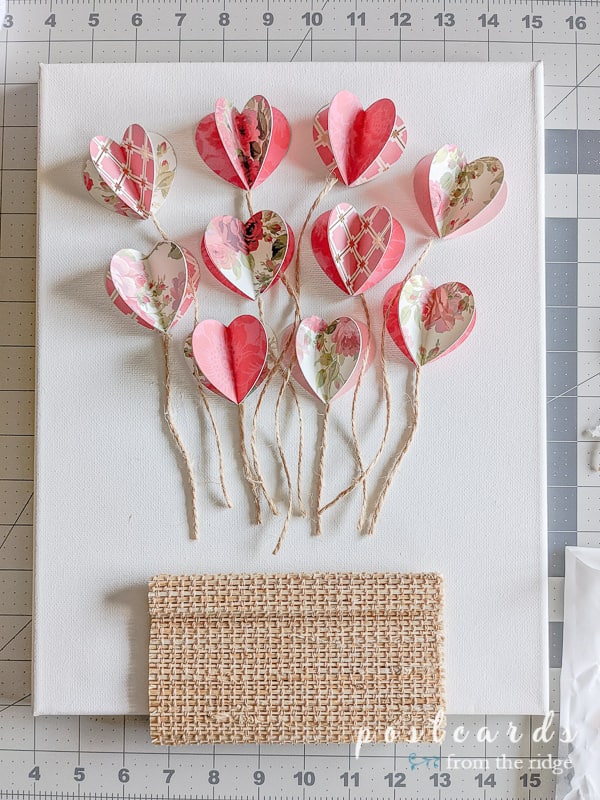
2. Layout your design
I arranged the hearts and woven material on the blank white canvas in a design that I wanted.
3. Cut twine into pieces
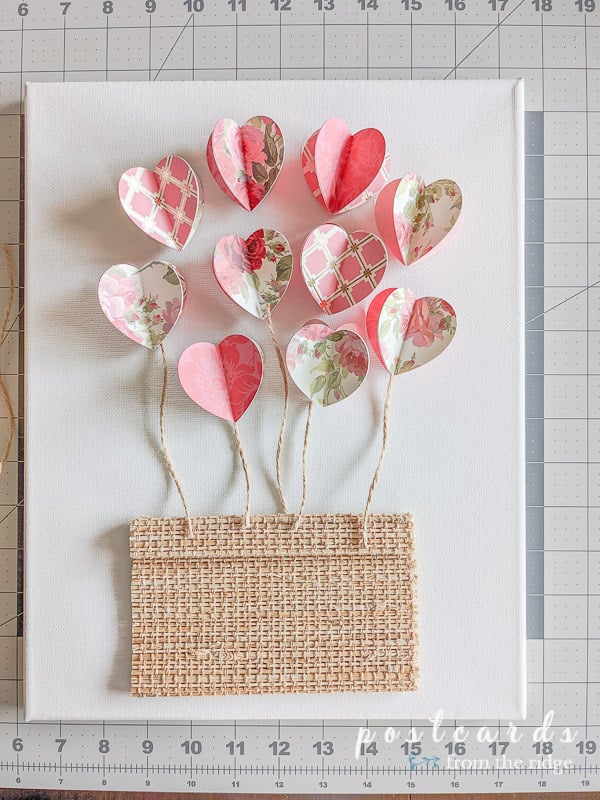
Once I had placed the hearts where I wanted them, I cut pieces of twine to connect them to the basket. (It still looks like a hot air balloon at this stage 😉)
4. Attach hearts and twine
Using a small brush, I applied mod podge to the twine pieces and hearts and attached them to the blank canvas.

For a little different look, you could add any type of background to the canvas before attaching the twine and hearts.

Note – if you like paper craft projects, you might like my tutorial for How to Make Flowers from Paper Egg Cartons.
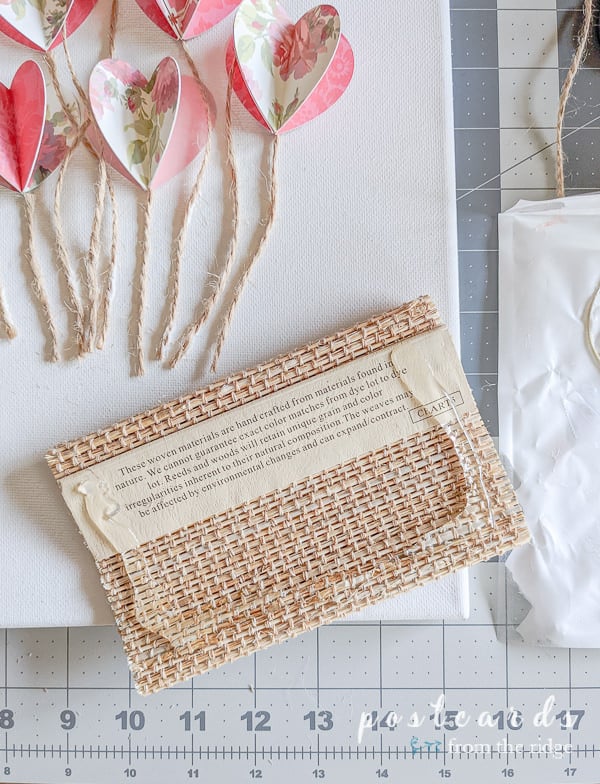
5. Attach basket
I had a scrap piece of woven wood shade material, but you could use a piece of grasscloth or heavy burlap, or really anything for the base. I was trying to create the look of a hot air balloon basket and thought the woven material had the same look. I folded the top edge over itself a couple of times for a little interest.

After I attached the hearts and twine, I attached the piece of woven wood material (you can use grasscloth) with all purpose clear adhesive.
6. Add Ribbon Hanger
For the finishing touch, I added some pink velvet ribbon to hang the artwork with.
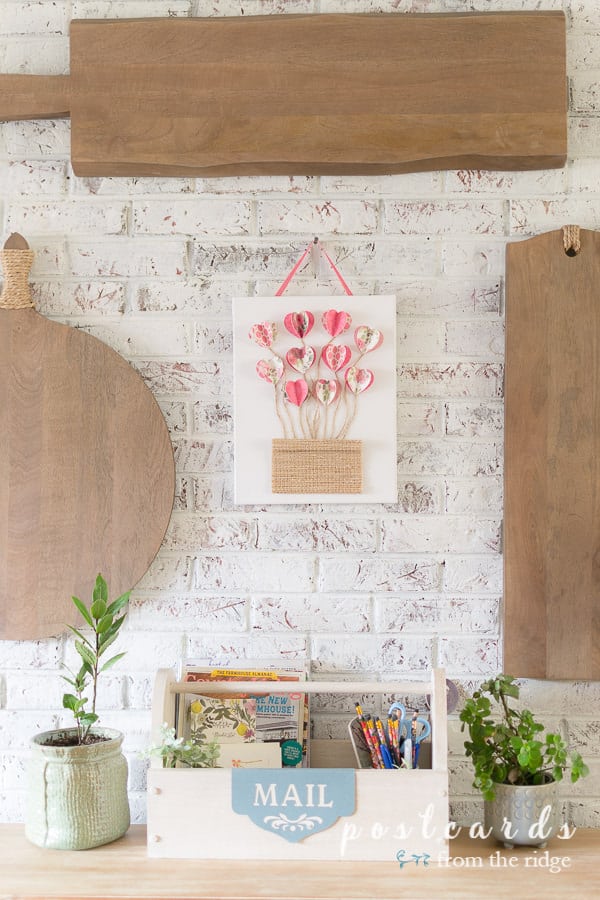
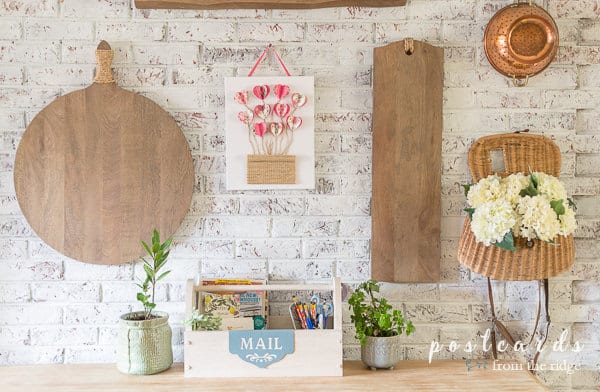
I hung it up on the brick wall in our kitchen for a sweet little pop of pink for Valentine’s day. It was a fun little afternoon project!
Note – you can see my tutorial for the painted finish on the brick wall here: How To Update Your Fireplace with A Unique Paint Finish
Here all of my projects and ideas from the Thrifty Style Team challenges:
- Creative Ideas for Using Thrifty and Vintage Items for Christmas
Decor - Fall Tablescape with thrifted, gifted, and foraged finds
- How to Make Pedestals from Thrifted Candesticks and Tart Pans
- How to Clean and care for Vintage Wooden Utensils
- Solar-Powered Sea Glass Mason Jar Lanterns
- Tiered Tray Decor Ideas with Thrifty and Vintage Finds
- How to Make Flowers from Paper Egg Cartons
- 13 Ideas for Thrifty Wall Art
- DIY Wooden Toolbox Mail Organizer
- Champagne Bucket Christmas Tree Stand
- DIY Wine Bottle Luminaries
- DIY Sheet Music Watercolor Fall Leaves
For printable instructions and supply list scroll to the bottom of the
page.
These are all the projects and ideas for this month’s Thrifty Style Team
challenge. The links are just below and I encourage you to visit everyone!

Redhead Can Decorate – DIY Home Gym
The Painted Hinge – How to Repurpose Cabinet Doors into Wall Decor
DIY Beautify – 7 Thrifty Cleaning and Organizing Solutions for the Home
2 Bees In A Pod – Repurposed Vintage Tea Towel
Postcards From The Ridge – Paper Heart Wall Art
The How To Home – DIY Family Charging Station
The Tattered Pew – Bergere Painted Shutters
Sweet Pea – DIY Frosted Branches
What Meegan Makes – How to Refresh a Stand Mixer with Spray Paint
Cottage At The Crossroads – Fabric Hearts with Yo-yos
Lora B. Create & Ponder – Upcycled Old Tin Organizer DIY
Here’s a printable instruction sheet for this little art project:
Yield: 1
Author: Angie @ Postcards from the Ridge
Estimated cost: $10
3-D Paper Heart Wall Art
Here’s a fun little piece of Valentine’s day wall art that you can
create in a couple of hours.
prep time: 5 Mperform time: 1 H & 30 Mtotal time: 1 H & 35 M
materials:
- Floral Cardstock paper
- Glue Stick
- Twine or Jute String
- Mod Podge
- Velvet Ribbon
- Small Piece of Grasscloth
tools:
- Cricut Maker or Paper Heart Punch
- Glue Gun
- Scissors
- Small Brush
steps:
- Cut hearts from cardstock with cricut or paper heart punch
- Fold each heart down the center and glue them together 3 at a time using a gluestick
- Lay design on blank canvas
- Cut twine pieces
- Attach hearts, twine, grasscloth piece to canvas using Mod Podge.
- Using a glue gun, attach velvet ribbon to the top of the backside of the canvas to use as a hanger.
Created using
Craft Card Maker
Sharing this project here:
Angie – this is the cutest artwork! Love your paper choices and design.
Thank you! It was so fun making it and I love anything with vintage looking roses.
It sure is fun to see your creative Valentine wall art! I love the various paper patterns and how your designed your gallery wall. Thanks for the tutorial, Angie. Have a wonderful weekend!
Thank you, Meegan! I always love seeing your paper projects too! Have a wonderful weekend yourself!
This is SO pretty, Angie! I think it looks like a basket with posies! I think it's perfect! Pinned!
Thank so much, Julie! I had a great time creating it!
So cute and creative.
Thanks, Rebecca!
This project looks great hanging on your kitchen wall. I thought it was a basket of heart shaped flowers and didn't see the hot air balloon shape until I read your post.
Thanks, Paula. My vision was a hot air balloon inspired by the little house from the movie "Up", but it definitely looks more like a basket of flowers. I'm happy with it anyway!
Super cute project, Angie! I totally thought it looked like a hot air balloon. Man, I need to find a used cricut and play around with it; think it could be so fun. Pinned!
Thanks, Lora! I've made some really fun things with my cricut. The possibilities are endless!
What a sweet project Angie and great way to repurpose that blind sample!!
Thanks, Cindy! I love reusing materials whenever possible and I thought that little sample looked a lot like a basket!
This is such a super cute and easy project, Angie! I bought some Valentine's Day paper yesterday without knowing what I would do with it so you have inspired me to do something similar. Shared on FB!
Thanks, Jane! I bought the paper on clearance last fall not knowing what I would do with it. It's always good to have a stash of creative materials, at least that's what I keep telling myself as my stash gets bigger all the time.😂
This is adorable Angie! I love decor like this that is simple to make but packs a whole lotta punch! And it being thrifty just makes it all that much better!
Thank you, Michelle! It really was pretty easy to make and I had everything on hand so it was a win all the way around!
I love your 3 D heart project! It turned out so cute. It inspires me to get out some Valentine's decor now!
Thanks, Kelly! I'm not crafty as a general rule, but have really enjoyed the little things I've made recently. It's definitely therapeutic!
THis is one of the cutest Valentine's ideas I've seen! Love it! Pinned. 🙂
Thank yo so much, Cindy! You're so sweet.
Love this fun Valentine project Angie and I'm excited to share it this week at the Tuesday Turn About Link Party!
Thank you so much for the feature, Michelle! I'm honored and always love seeing the projects and ideas on your beautiful blog.
This is one of the cutest Valentine projects I've seen! Love it!
Shelley
Thank you, Shelley! I had so much fun putting it all together.
A basket full of heart flowers!! This ‘heart art’ brings such a sense of whimsy! This project brought a smile to my face!!
Thank you, Cindy! I'm so glad it made you smile!
Such a fun and pretty Valentine's project Angie ♥
Thank you for sharing your paper heart wall art at Create, Bake, Grow & Gather this week. I'm delighted to be featuring it at the party tomorrow and pinning too.
Hugs,
Kerryanne
Thank you so much, Kerryanne! I feel very honored to be a feature on your beautiful blog!
What a beautiful art piece! And quite simple to make. I just love it.
Alexandra
EyeLoveKnots.com
Thank you, Alexandra! Yes, it was pretty simple to make with just a handful of materials!
Another fabulous job. I really like the colours and designs of paper that you chose, it all goes so well together. I have had my Cricut explore for about 2 year now and try and use it in most of my projects. It is such a great machine.
Thank you, Anita! I don't use my Cricut as often as I'd like but I always enjoy making things with it. It's amazing what all you can do with them!
I don't care if they're flowers or balloons 😀 they're super cute and such a fun way to make simple Valentine's decor too.
I love this project! So sweet for Valentine's Day. Pinned and shared!
Kim
Such a sweet Valentine's Day project! Pinned for later.