How to Update a metal file cabinet
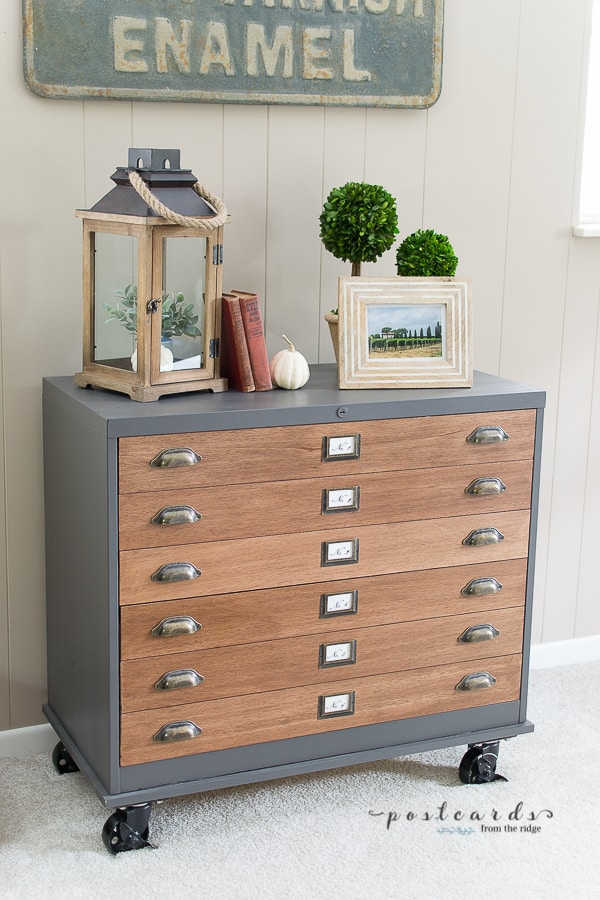
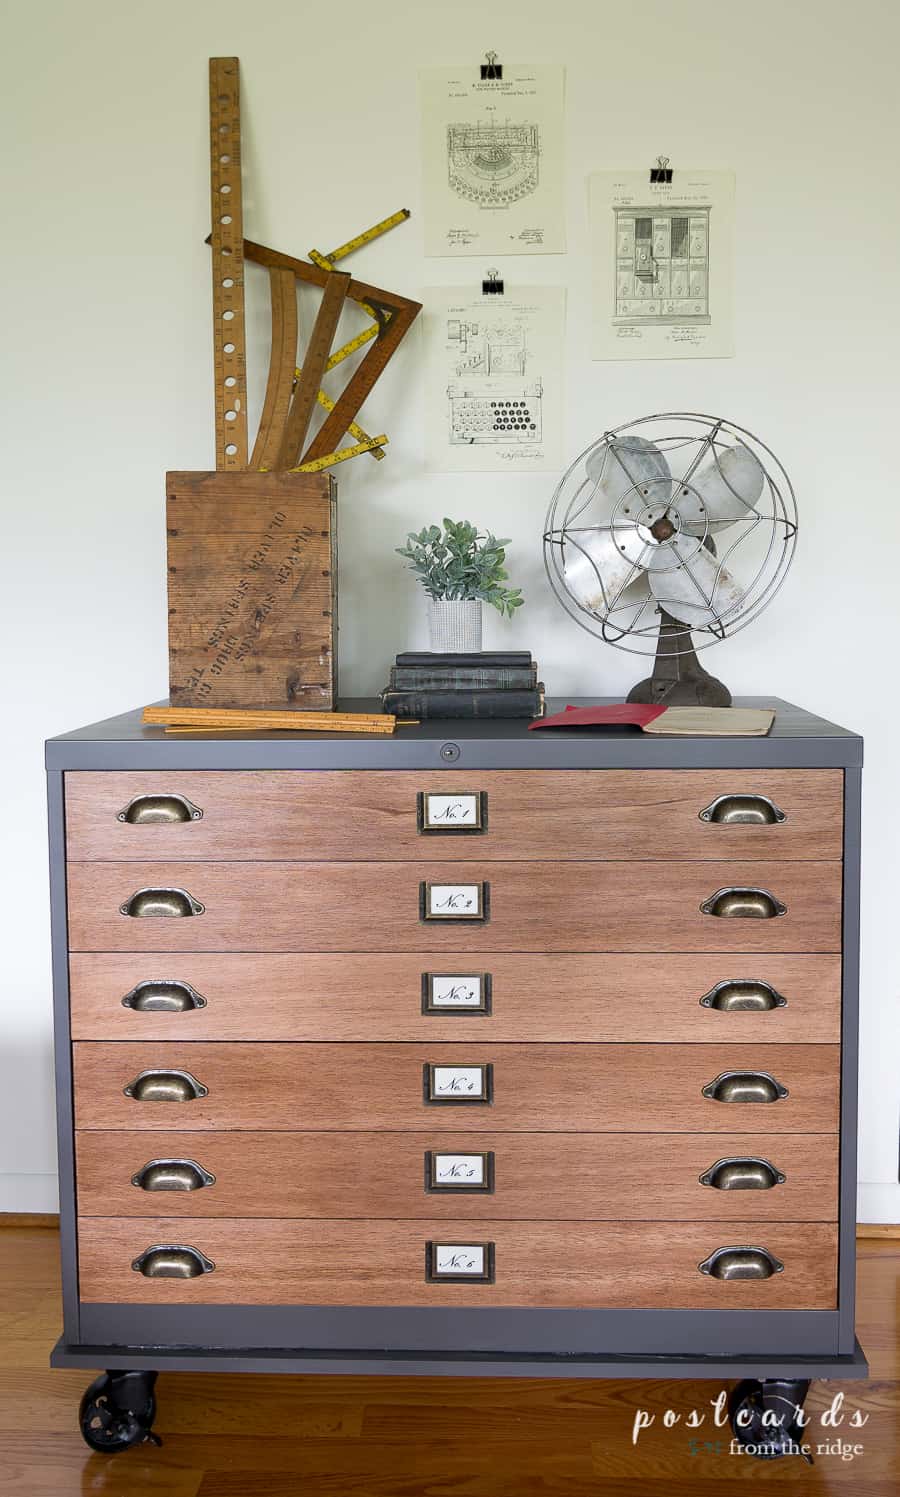
See how to turn a boring metal file cabinet into a vintage industrial looking piece of furniture.
This post contains affiliate links for your convenience. For full disclosure, go here.
“Necessity is the mother of invention”.
Well, I didn’t actually invent anything for this project, but I did fill a need with some elbow grease and creativity.
What I needed was two things in one: a printer stand and a filing cabinet. I had looked online and found some decent file cabinets that weren’t too expensive but they required several hours assembly time. And they didn’t all have great reviews.

I also found some gorgeous file cabinets that were pre-assembled and had better reviews, but they were in the $700 range. And I just wasn’t willing to spend that much for a filing cabinet. So I put on my thinking cap and came up with a solution.
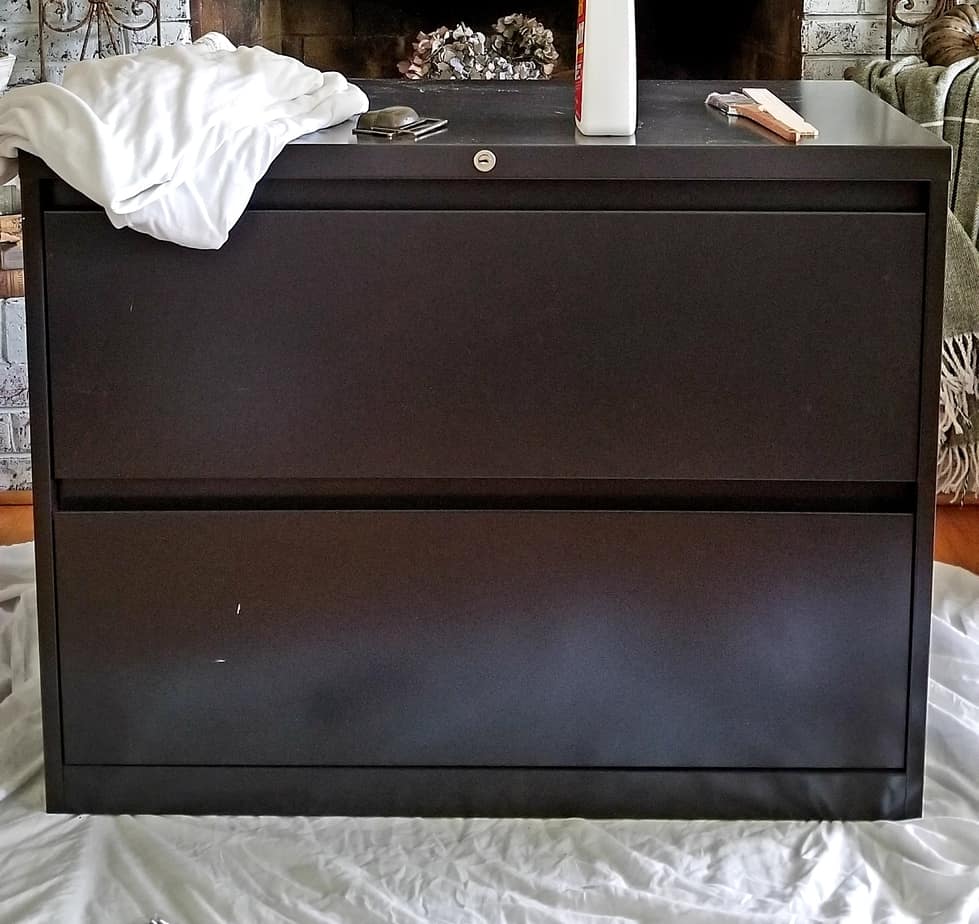
We had this sturdy but generic filing cabinet in the basement. It’s works great and retails for around $300 new. We got it for free several years ago and it had become full of papers that needed to be recycled or purged. So it was being underutilized to say the least. And in this phase of my life I’m either repurposing or getting rid of things that aren’t being used. Use it or lose it. My kids will thank me someday.
Anyway, it’s going to be in our family room office area and will be seen by anyone who comes in here. And basic filing cabinets aren’t exactly attractive pieces of furniture, are they? So I wanted to give it a makeover and browsed the web for ideas.
I love the look of vintage map drawers and blueprint cabinets so I drew inspiration from those. There were several pieces that inspired me and I combined ideas from a few of them for this project. Here’s what I did.
Supplies Needed
- Drawer Pulls
- Drawer Label Holders
- Balsa Wood Sheets
- Drill Bit
- Wood Stain
- Rags
- Clear Finish
- Sanding sponges
- Tack Cloth
- Adhesive
- Power Drill
- Paint
- Primer
- Paint Brush
- Level
- Utility Knife
- Straight Edge
- Heavy duty wheels
You can see all of the supplies needed for this project HERE.
How to give a file cabinet a vintage industrial makeover
1. Clean
The first thing I did was give the cabinet a good cleaning with my favorite pre-paint cleaner.
2. Prime and paint if desired
If you’ll be painting your piece, you’ll want to lightly sand the surface with a fine sandpaper. Then use a tack cloth to remove any dust particles. The paint will need to be suitable for metal.
I used Benjamin Moore Iron Mountain for my project, but you can get a similar look with this paint, which is great for metal.
3. Cut the wood pieces
Since I’m limited in my heavy duty DIY skills, especially when it comes to using power saws, I used balsa wood for the drawer fronts. I chose them because I could cut them with my utility knife and a metal straight edge and not have to use a power saw. I also liked how they were thin enough that they didn’t stick out beyond the face of the cabinet. My drawers were 12″ tall, so I used 3 4″ slats on each of the drawers. You could use 3″ slats for a different look. It’s totally a personal preference.
Note – this wood is very soft and fragile, so you don’t want to use it on the top where things might be sitting on it.
To cut my pieces, I measured the width of the drawer fronts, marked the width on the wood pieces, and then used my utility knife against a metal straight edge to cut them. I found that the cuts were cleaner if I made several gentle passes with the knife instead of one deep one. A fresh, sharp blade in the knife also helps.
4. Stain and finish wood pieces

You don’t have to stain the wood, but I wanted a richer look and had some gel stain in my stash so I used it to deepen the color. First I sanded the wood slats and removed the dust with a tack cloth. Then after deciding on a stain color, I applied it with a rag, working in a circular motion so the stain would get down into the grain. You’ll want to be sure to stain the edges of the wood pieces too.

Once the stain dried, I applied my favorite antique flat clear finish. After the first coat dried, I sanded and used a tack cloth to remove all the dust and then applied a second coat. You can see in the photo above how the clear finish brings out the color in the wood. It also protects it from any oils and dirt on your fingers and hands.
5. Attach wood to drawer fronts
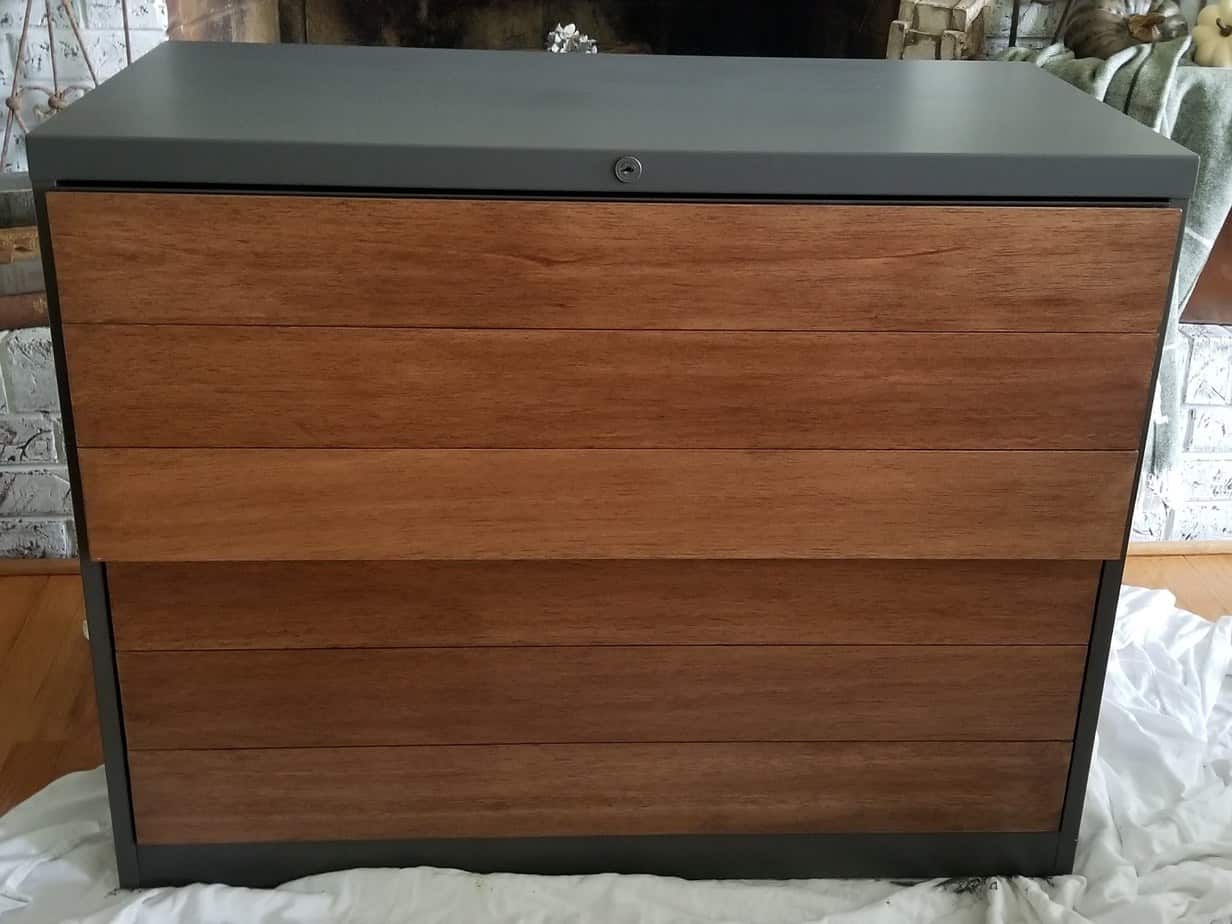
After the clear finish dried completely, I used adhesive to attach the wood slats to the metal drawer fronts. I applied a generous amount to the back of each piece in a zigzag and next to the edges. Then I carefully positioned them on the drawers. The adhesive doesn’t dry instantly, so you’ll need to hold it in place with painters tape or something similarly gentle.
Note – Don’t use any clamps on balsa wood because it’s so soft that you’ll get indentions in it.
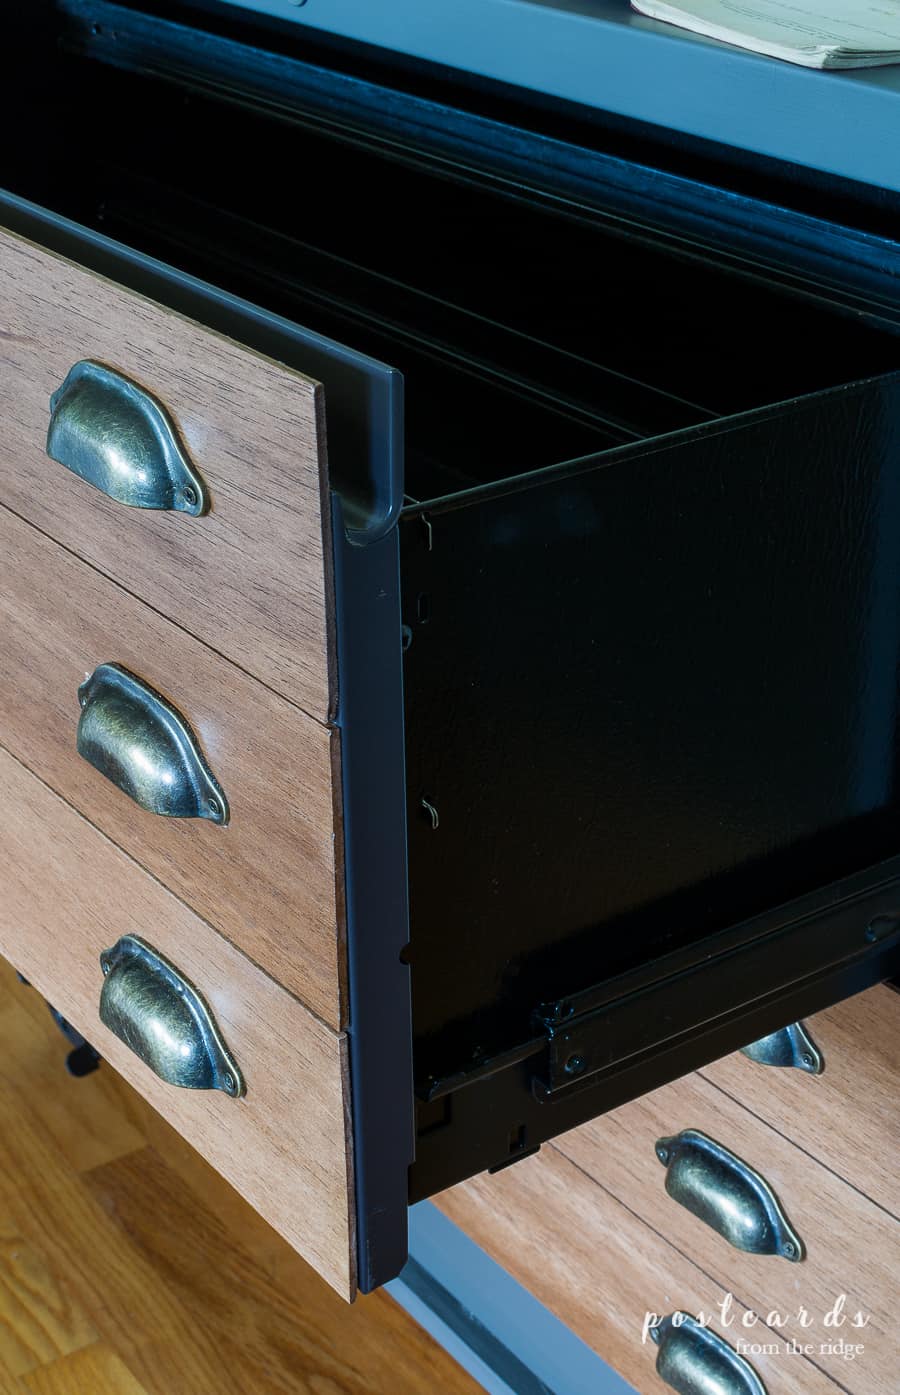
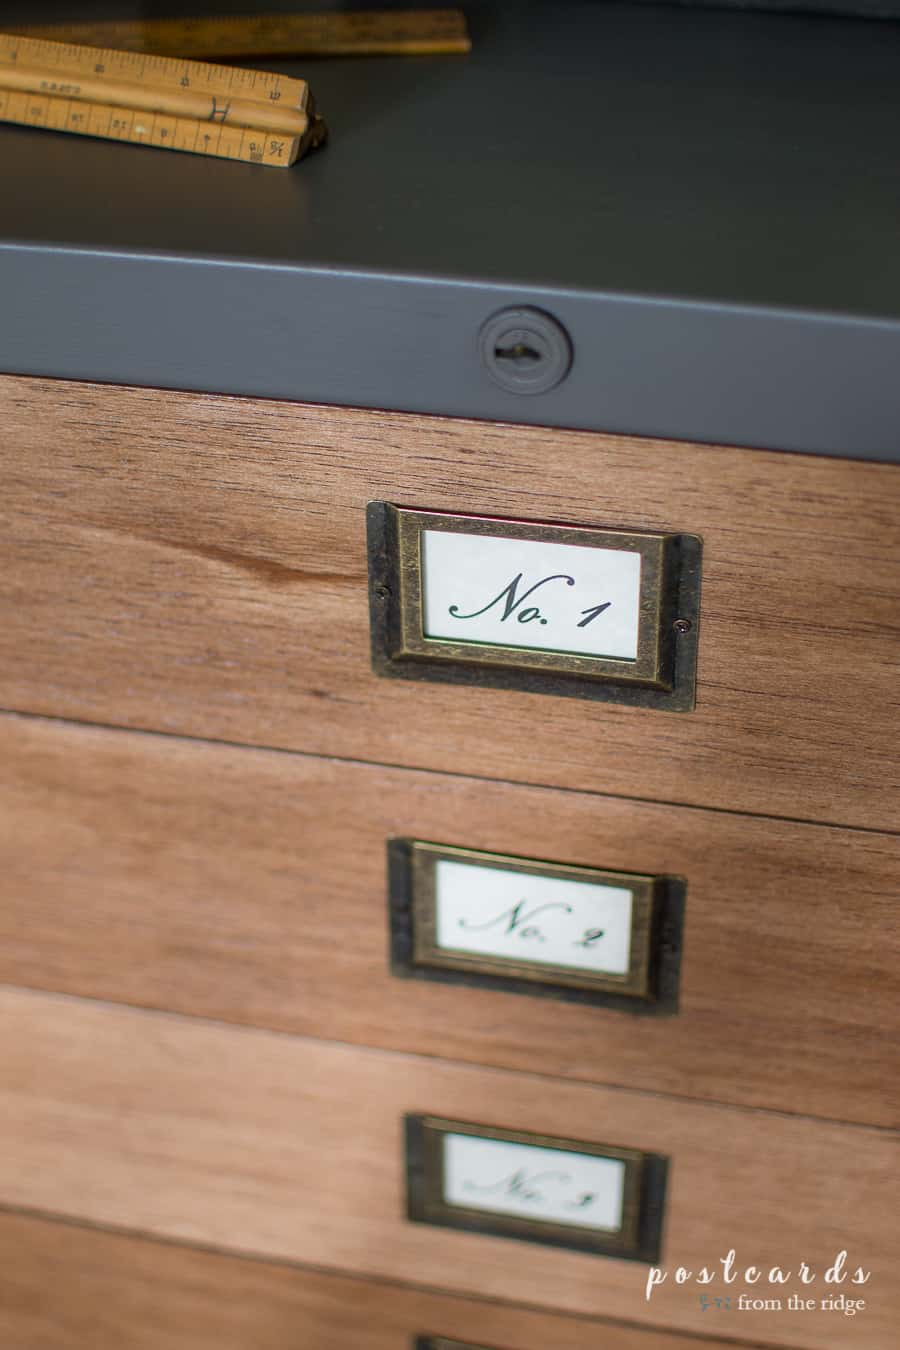
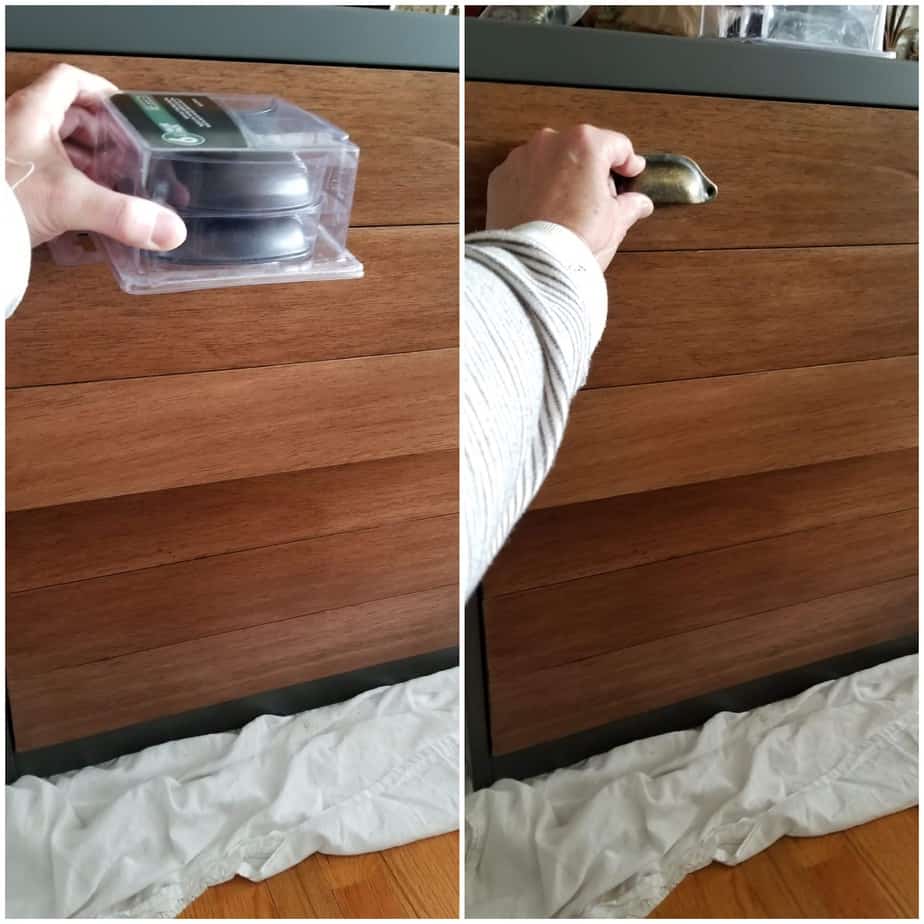
6. Attach vintage looking hardware
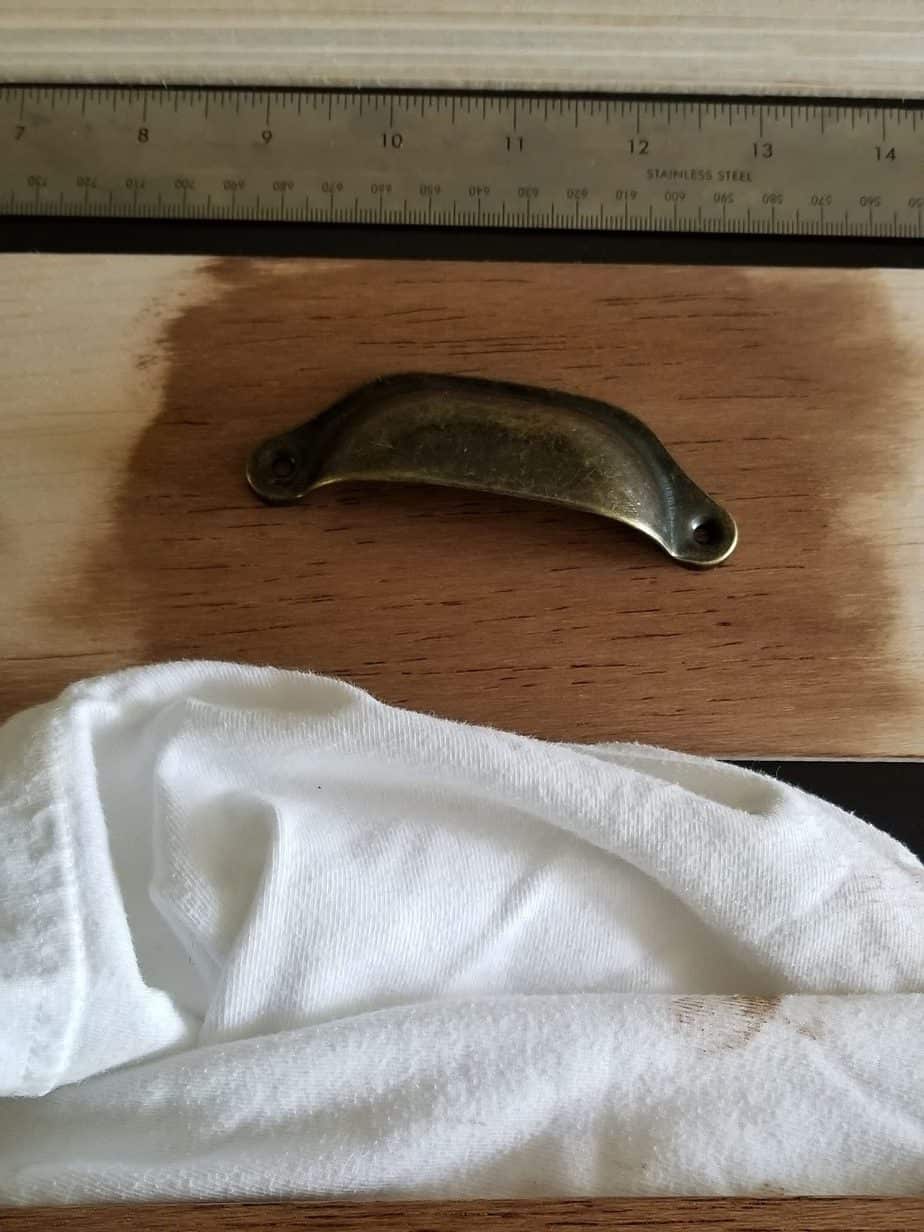
Deciding on the hardware and installing it was probably the biggest challenge of this project. There are so many great choices!

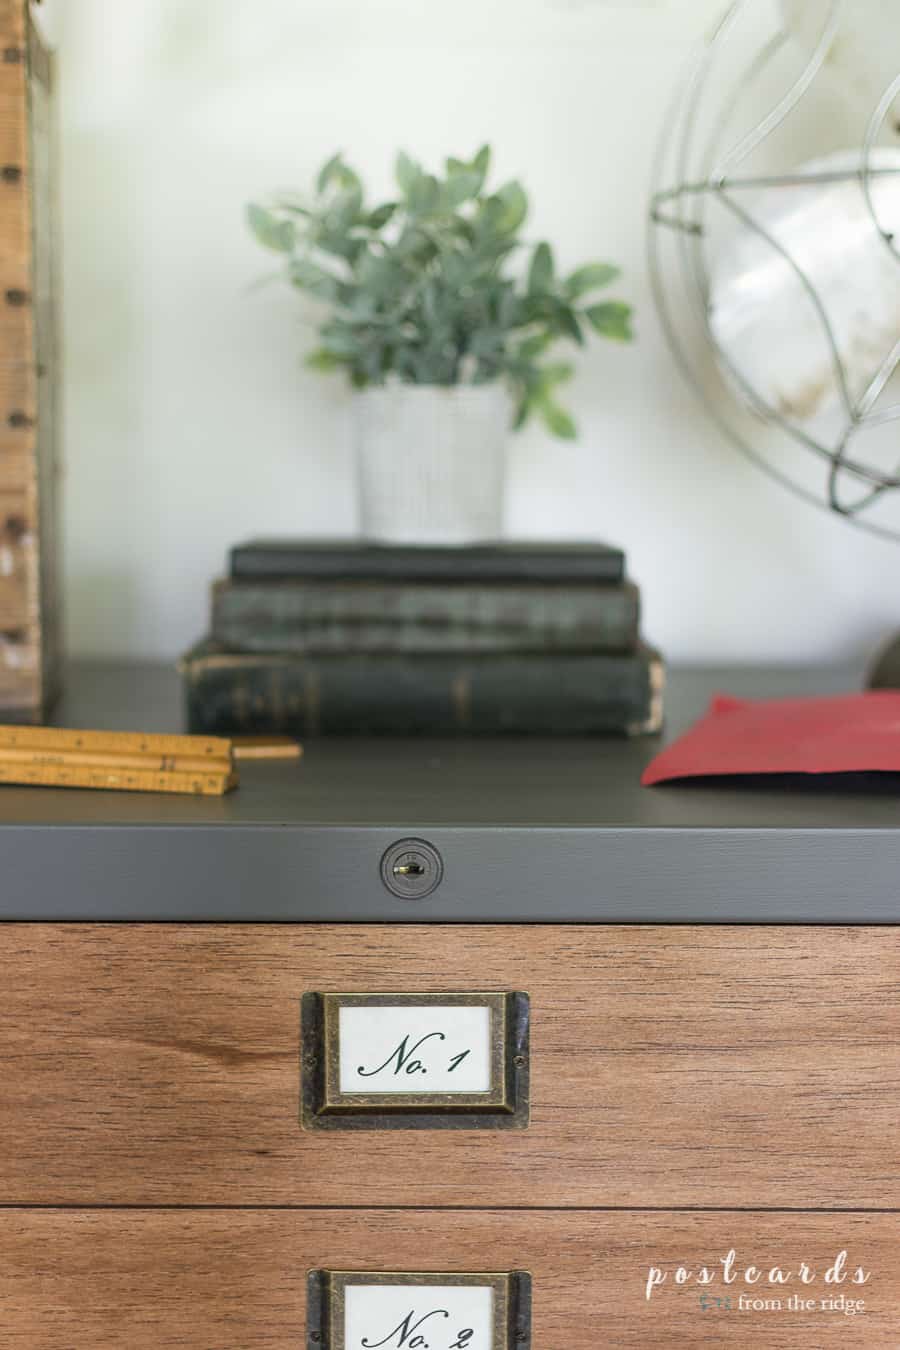
In the end, I went with these drawer pulls and label holders to get the antique look that I was after.
To attach them, I measured where I wanted to place them and then marked the spots where the holes needed to be drilled. Before drilling, I used my level to make sure they were straight. Then I pre drilled the holes through the wood and metal using a metal drill bit. Next, I attached each pull and label holder. It took a little time but wasn’t nearly as difficult as I thought it would be.
I actually had a poll on my facebook page asking for opinions after I had narrowed it down to 2 choices. And although I liked the darker ones a lot, they didn’t really give the antique vibe that I was wanting.
7. Attach heavy duty wheels

Because the bottom of my cabinet was open, I had to attach a piece of wood to mount the wheels to. I made a trip to Home Depot and had a piece cut to the size I needed. I wanted it slightly larger than the cabinet so the wood is 1″ wider and 1″ longer. That gives it a 1/2″ clearance all the way around.
And I needed it to have more depth than regular plywood so the screws wouldn’t scrape the bottom of the drawers, so I added small blocks to the wood to mount the wheels to. (They cut my scraps from the base into blocks for me at Home Depot.) I measured where they needed to be and then attached them with construction adhesive.
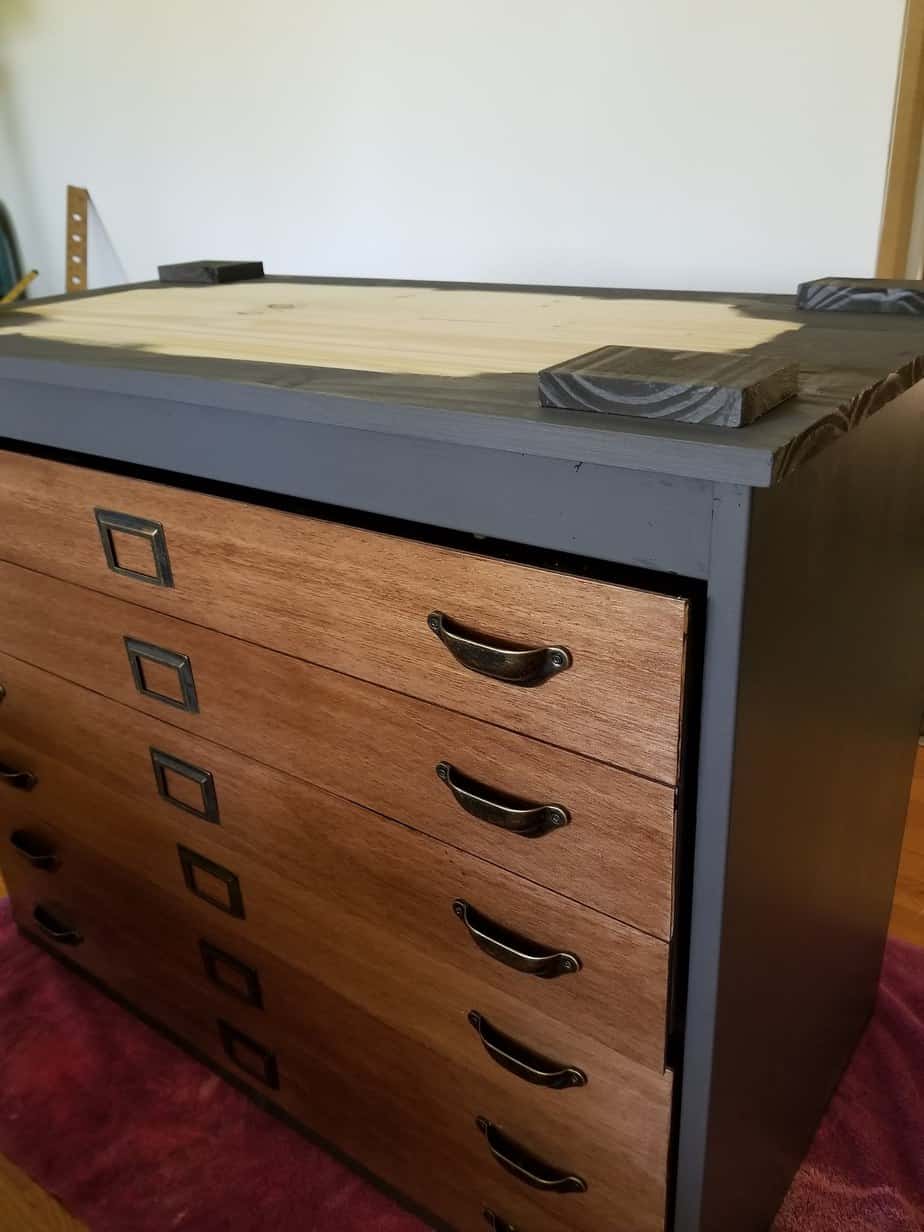
After the adhesive dried, I painted the blocks and the edges of the base to match the cabinet. After that I pre-drilled the holes and attached my wheels.
I went with heavy duty metal swivel wheels because the cabinet is heavy to begin with and will be even heavier once the printer is on top of it and files are inside the drawers. I didn’t want to take any chances.
All that was left was flipping it upright and then it was ready to use!

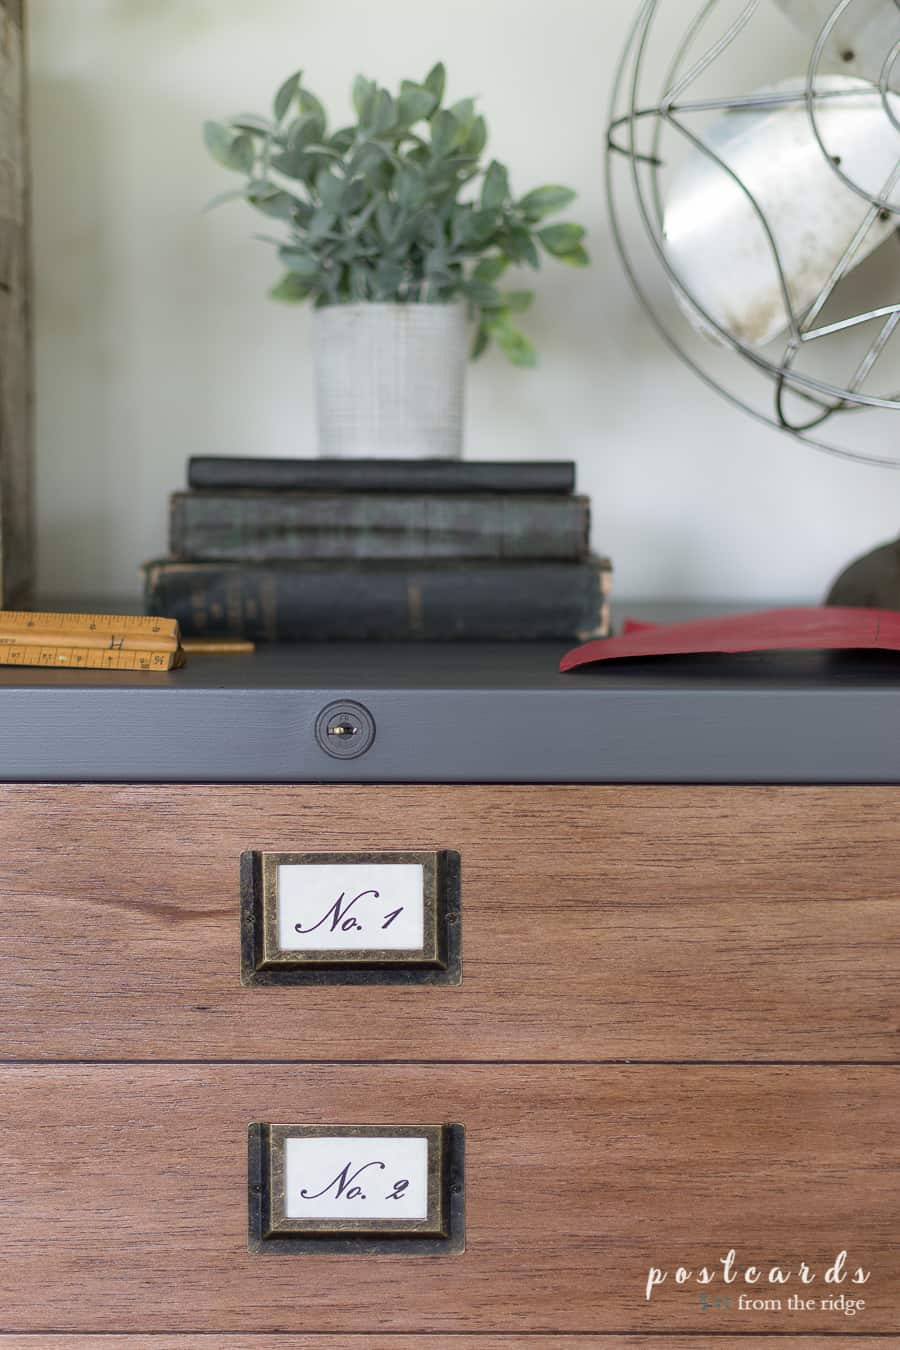
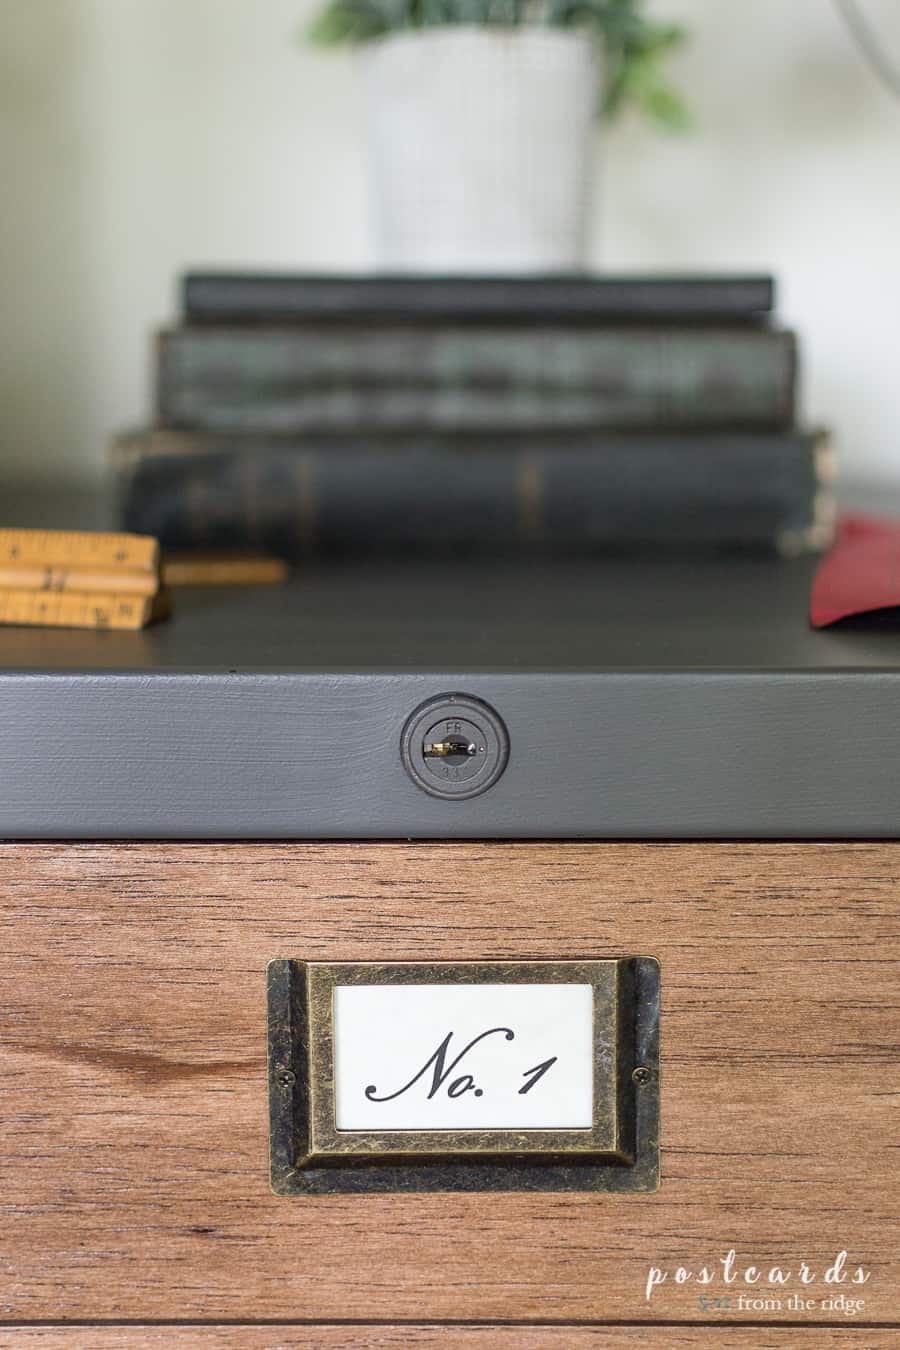
For more of the vintage industrial vibe, I added labels with vintage fonts to the label holders. And I dressed up the top with a few vintage items from my stash.


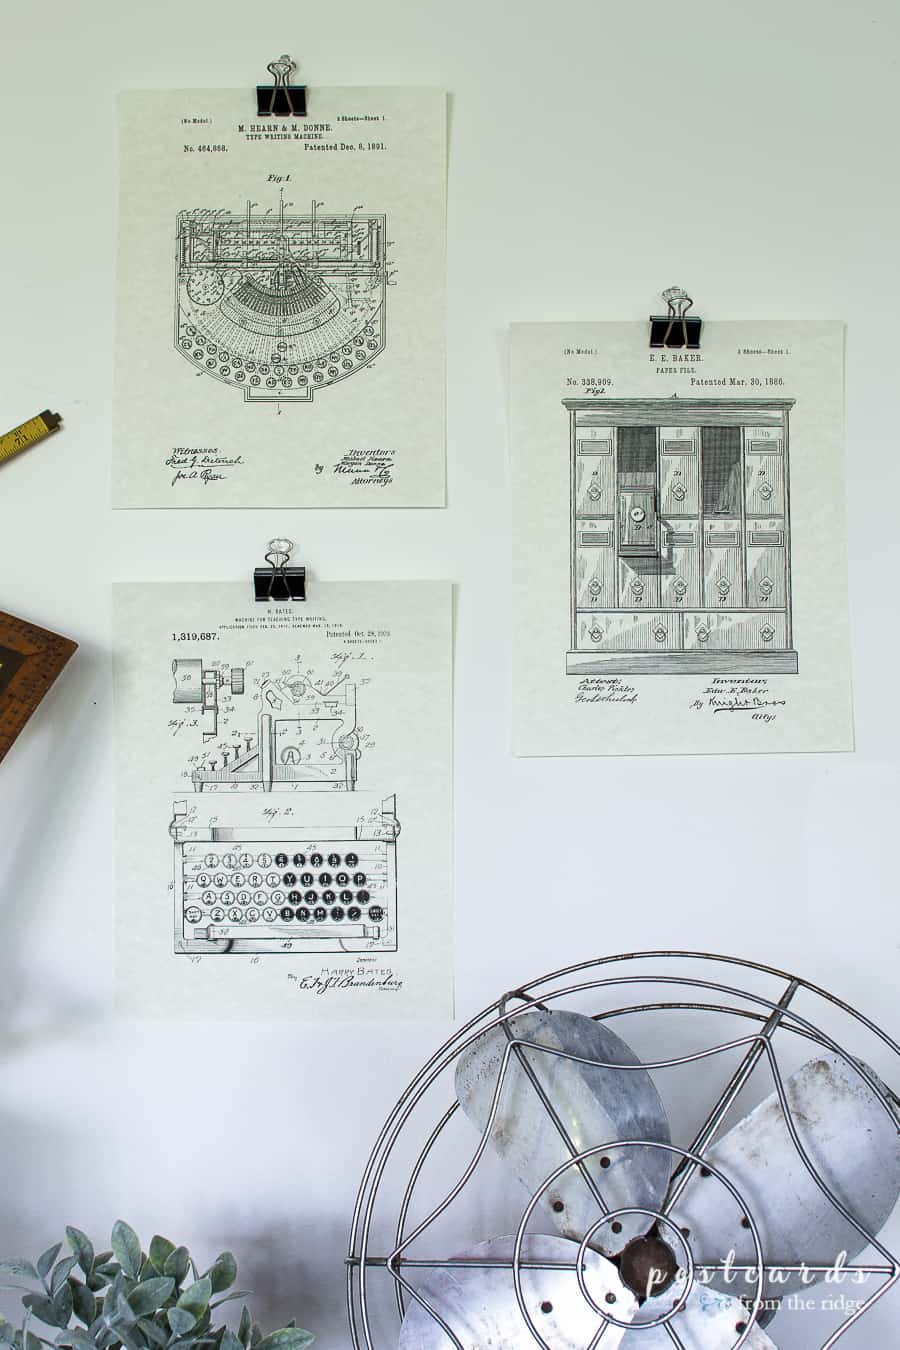
And just for fun, I made some industrial artwork to go on the wall.
What do you think of the makeover? It looks a lot better than a boring, basic file cabinet now doesn’t it? I’m so glad I gave it a facelift.

The next time you see a boring file cabinet or utilitarian piece of furniture at a great price, don’t pass it up because it’s plain. There’s always a way to make it look nicer and fit your style.
You can see all of the supplies needed for this project HERE.
Want to see more ways to makeover items with paint and a few supplies? Go here for all of my past paint projects:
and here for all of my diy tutorials:

Leave me a comment below and let me know what you think of this project!
Yield: 1
Estimated cost: $50
How to Update a File Cabinet
Learn how to give your old, boring, metal file cabinet a makeover so it looks like a vintage industrial map cabinet.
prep time: perform time: 6 hourtotal time: 6 H
materials:
- Drawer Pulls
- Drawer Label Holders
- Balsa Wood Sheets
- Drill Bit
- Wood Stain
- Rags
- Clear Finish
- Sanding sponges
- Tack Cloth
- Adhesive
- Heavy duty wheels
tools:
- Power Drill
- Paint
- Primer
- Paint Brush
- Level
- Utility Knife
- Straight Edge
steps:
How to Update a Metal File Cabinet
- Clean the metal file cabinet with this pre-paint cleaner.
- Prime and paint if desired. If you’ll be painting your piece, you’ll want to lightly sand the surface with a fine sandpaper. Then use a tack cloth to remove any dust particles. The paint will need to be suitable for metal.
- Cut the wood pieces. To cut my pieces, I measured the width of the drawer fronts, marked the width on the wood pieces, and then used my utility knife against a metal straight edge to cut them. I found that the cuts were cleaner if I made several gentle passes with the knife instead of one deep one. A fresh, sharp blade in the knife also helps.
- Stain and finish the wood pieces.
- Attach wood pieces to the fronts of the metal drawers.
- Attach hardware. I used these drawer pulls and these label holders.
- Add wood base if needed and attach heavy duty wheels.
Thanks for dropping by.

Fantastic makeover! It looks like an expensive piece of furniture.
Thank you, Paula! That means a lot coming from you!
Fabulous! I'm staring at the file cabinet in my office and getting all kinds of ideas! Thanks for the inspiration! Love it!
Thanks, Benita! Let me know what you do to your file cabinet! I'd love to see it.
Inspiring! I LOVE LOVE LOVE what you did! I am trying to figure out how to get me an office and I can definitely use this idea when I figure it out.
🙂 gwingal
Thanks, Nikki! I hope you figure it out. It's always nice to have a dedicated office space if possible.
Ok Ange…this is seriously amazing. And yes…your children will thank you some day. All the heart eyes!!!! ~~~ Susie
Aww, thanks so much, Susie! I have lots more to get rid of but I love actually using the things we have.
Fantastic Idea! I had the same problem in my home office when I was looking around. Love this!
Thank you!
Wonderful makeover!
Thank you, Lily!
Not only is this creative, it looks amazing Angie!! Pinworthy for sure!
Thank so much, Janet! I really appreciate that.
Love it! Great job.
Thanks, Jean!!
Gorgeous! So creative – I love repurposing/reinventing to make things beautiful and keep them out of a landfill.
What a great job and inspiring post. Your refurb is so attractive.
Very smart, looks great!
Absolutely fantastic redo AND tutorial I just love the new look, Angie!
WONDERFUL idea! Thank you so much for sharing – I can't wait to put your creativity into action in my office!!
I am thrilled to have found your fabulous project while searching for ways to make my filing cabinet fabulous! Your idea blows everything else I've seen out of the water and will look fantastic in my new home 😁. I'm one year into a divorce and just closed on the first home I've owned and not rented on my own. This idea of yours will help in making it truly my home with my style! Thank you ever so much for sharing and I am now going to look at your other projects. Do you have an Instagram I can follow? Peace and joy to you
I'm so glad you found it useful! it's a great way to give an old file cabinet a brand new, stylish look. My instagram handle is postcardsfromtheridge
Have a great day!